< Exercise & Fitness -

Category: Exercise & Fitness

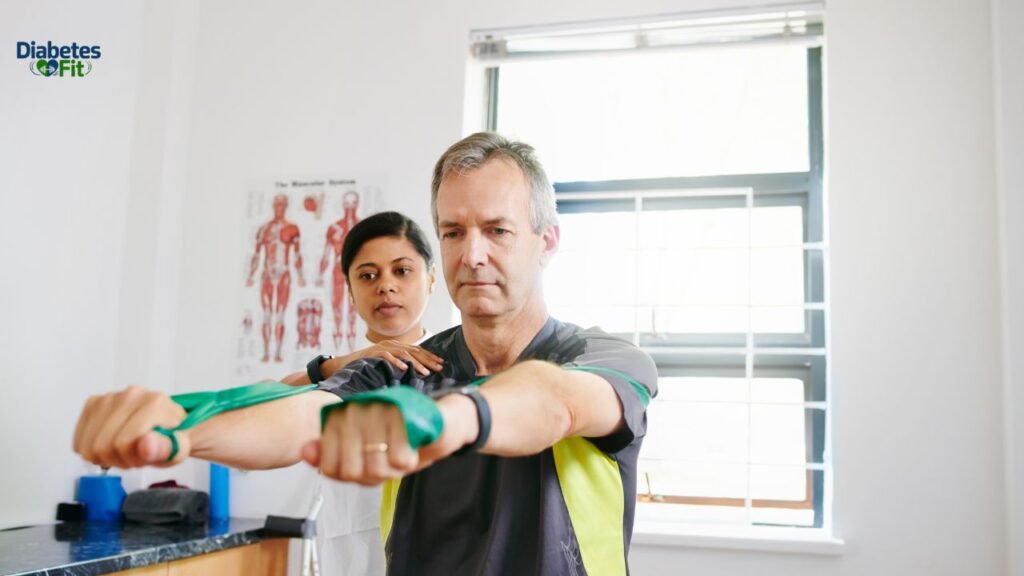
  • Exercise for Height Increase: What Science Says and Which Workouts Make a Difference

    Exercise for Height Increase: What Science Says and Which Workouts Make a Difference

    You want to be taller. Maybe you’re still growing. Maybe you’re an adult who feels like a few extra centimeters would change how you carry yourself, how you perform athletically, or simply how you feel when you walk into a room. And you’ve heard that exercise can help — but you’re not sure what’s actually true.

    Here’s the reality: exercise for height increase does work — but it works differently depending on your age, and the mechanisms behind it matter more than most people explain. For teenagers and young adults still in the growth phase, certain exercises actively stimulate the growth hormone and bone growth processes that drive height. For adults whose growth plates have closed, specific exercises can decompress the spine, improve posture, and restore 1–3 centimeters of height that poor posture and compressed discs have been silently stealing from you for years.

    This guide covers the complete picture — the real science, the most effective exercises, age-specific strategies, and the supporting lifestyle habits that work alongside exercise to maximize your height potential. No false promises, no gimmicks — just an honest, medically grounded approach to using exercise for height increase effectively.

    If you have blood sugar, also read Is Yogurt Good for Low Blood Sugar?

    Can Exercise Really Increase Your Height? The Science Explained

    Before diving into specific exercises, understanding how exercise influences height is essential — because the mechanism determines which exercises matter and what results are realistic.

    How Height Is Determined

    Your ultimate height is determined primarily by genetics, accounting for approximately 60–80% of your final height. The remaining 20–40% is influenced by nutrition, sleep, hormones, and physical activity during the growth years.

    Height is determined by the length of your long bones — the femur (thigh), tibia (shin), and the vertebrae of the spine. These bones grow at the growth plates (epiphyseal plates) — zones of cartilage near the ends of bones where new bone tissue forms. When growth plates close — typically between ages 14–18 in girls and 16–21 in boys — bone lengthening stops permanently.

    This is the most important biological fact about exercise for height increase: the effect is significantly different before and after growth plate closure.

    How Exercise Supports Height Increase During Growth (Teenagers and Young Adults)

    During the growth years, exercise supports height through these mechanisms:

    1. Stimulating Human Growth Hormone (HGH)

    Human growth hormone is the master regulator of physical growth. It directly stimulates bone growth at the growth plates and drives increases in bone length and density. Exercise — particularly high-intensity exercise, resistance training, and activities involving jumping and running — is one of the most powerful stimulators of HGH secretion.

    A study published in the Journal of Applied Physiology found that sprint exercise produced a 450% increase in HGH levels in the 30–60 minutes following intense activity. This HGH surge, occurring repeatedly during the teenage growth years, contributes meaningfully to skeletal growth.

    2. Mechanical Loading on Growth Plates

    Appropriate mechanical loading — the stress placed on bones during weight-bearing exercise — stimulates bone remodeling and growth at the growth plates. Activities like basketball, volleyball, swimming, and gymnastics apply the kind of mechanical loading that encourages bone to grow longer and stronger. This is why physically active children and teenagers tend to grow taller than sedentary peers, even when genetics are similar.

    3. Improving Posture and Spinal Alignment

    Even during the growth years, poor posture can compress the spine and reduce measured height by 2–4 centimeters. Exercise that strengthens the core and back muscles maintains proper spinal curvature and maximizes the actual height being grown.

    How Exercise Supports “Height” in Adults (After Growth Plate Closure)

    Once growth plates close, new bone lengthening is not possible through exercise. However, adults can meaningfully increase their measured standing height through:

    1. Spinal Decompression

    The spinal discs between vertebrae are made of water-rich cartilage. During the day, gravity compresses these discs, reducing their height. By evening, most adults are 1–2 cm shorter than they were in the morning. Exercises that decompress and stretch the spine — particularly hanging exercises, yoga, and swimming — can partially reverse this compression and restore 1–3 cm of height over time.

    2. Posture Correction

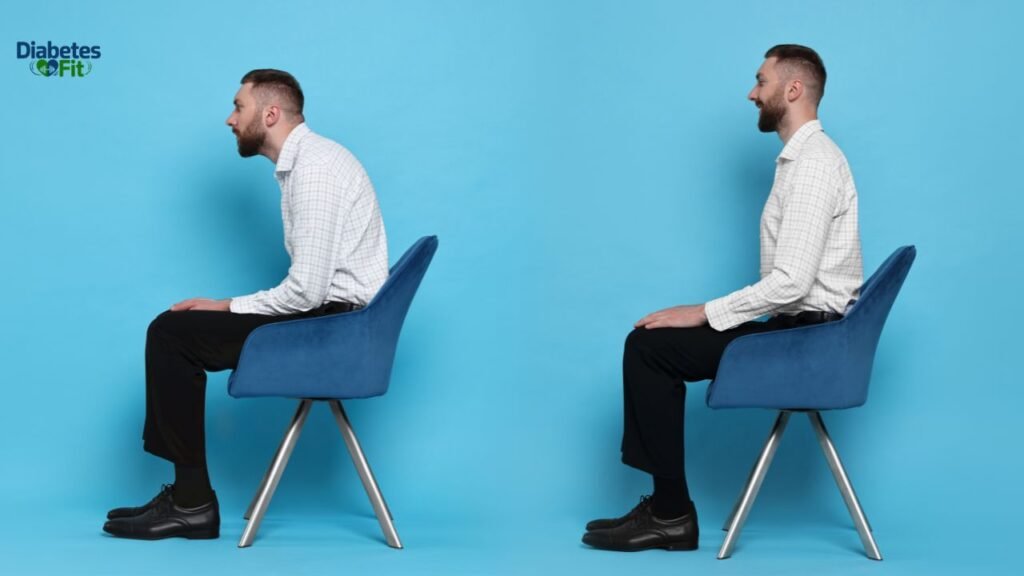
    Rounded shoulders, a forward head position, and thoracic kyphosis (hunched upper back) can reduce apparent height by 2–5 cm in adults. Strengthening the muscles that maintain proper posture — the deep spinal extensors, rhomboids, and core muscles — visibly increases standing height without any change in actual bone length.

    3. Core Strengthening for Spinal Support

    A strong core supports the lumbar spine and prevents the posterior pelvic tilt that reduces apparent height. Core-focused exercises can improve standing posture and increase measured height by 1–2 cm.

    Exercise for Height Increase: The Best Exercises by Category

    Category 1: Hanging Exercises (Best for Spinal Decompression)
    Exercise for Height Increase

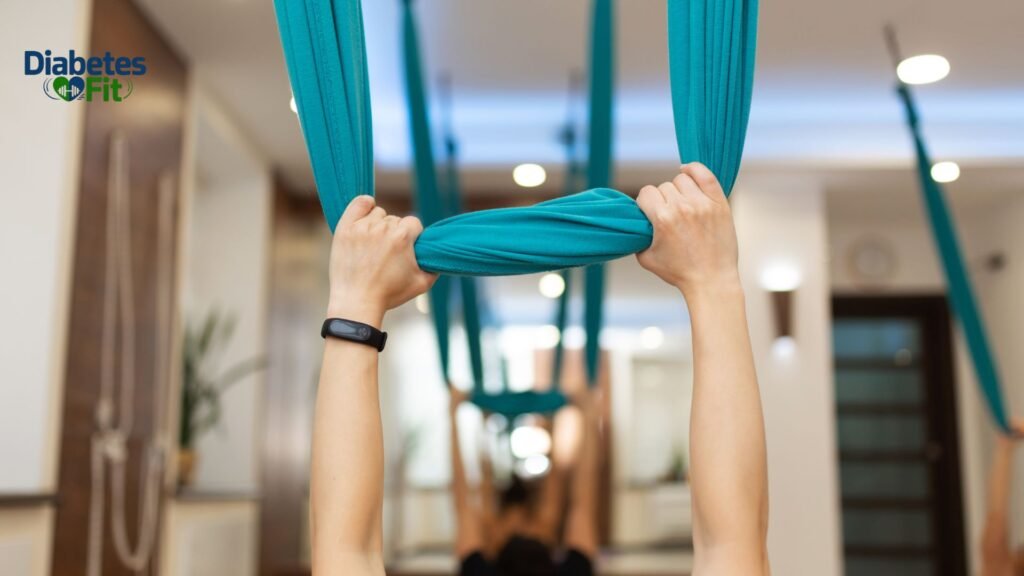
    Hanging from a bar is one of the most effective exercises for height increase through spinal decompression. When you hang, gravity pulls your body downward while your hands hold the bar — creating traction through the entire spine that stretches the vertebral discs and spaces between them.

    Dead Hang

    How to do it:

    1. Grip a pull-up bar with both hands, shoulder-width apart, palms facing away from you
    2. Allow your body to hang completely relaxed — feet off the ground
    3. Let your shoulders rise naturally with the weight of your body
    4. Hold for 20–30 seconds
    5. Lower down, rest 30 seconds, repeat 3–5 times

    Duration: Build up to holding for 60 seconds over several weeks. Frequency: Daily — morning or evening. Height benefit: Decompresses intervertebral discs; regular practice can restore 1–2 cm of compressed disc height over weeks

    Hanging Twists

    How to do it:

    1. Hang from a pull-up bar in the same position as the dead hang
    2. Slowly rotate your hips and lower body from side to side while hanging
    3. Allow the rotation to stretch the lateral muscles and facet joints of the spine
    4. Perform 5–10 rotations per side

    Additional benefit: Addresses lateral spinal compression that a straight hang doesn’t reach

    Category 2: Stretching and Yoga Exercises (Best for Posture and Flexibility)

    These exercises directly address the postural habits and muscular tightness that reduce standing height in adults and developing teenagers.

    Cobra Stretch (Bhujangasana)

    How to do it:

    1. Lie face down on a mat with your hands placed under your shoulders
    2. Slowly push your upper body up, extending your arms and arching your back
    3. Keep your hips on the ground
    4. Hold for 15–30 seconds, breathing deeply
    5. Lower back down slowly
    6. Repeat 3–5 times

    Height benefit: Extends and decompresses the lumbar and thoracic spine; improves spinal extension range of motion; counteracts the forward-hunching posture of daily computer/phone use

    Cat-Cow Stretch

    How to do it:

    1. Start on hands and knees — wrists under shoulders, knees under hips
    2. Cow position: Inhale, drop your belly toward the floor, lift your chest and tailbone up
    3. Cat position: Exhale, round your spine toward the ceiling, tuck your chin and tailbone
    4. Flow between these positions slowly — 10–15 full cycles

    Height benefit: Mobilizes every segment of the spine from neck to sacrum; reduces stiffness that contributes to compressed posture; particularly effective first thing in the morning

    Child’s Pose (Balasana)

    How to do it:

    1. Kneel on the mat, big toes touching
    2. Sit back onto your heels and extend your arms forward on the ground
    3. Allow your forehead to rest on the mat
    4. Hold for 30–60 seconds, breathing deeply into your back
    5. Repeat 3–5 times

    Height benefit: Passively decompresses the lumbar spine; stretches the erector spinae (the long muscles running alongside the spine) that, when tight, compress the vertebrae

    Triangle Pose (Trikonasana)

    How to do it:

    1. Stand with feet 3–4 feet apart
    2. Turn the right foot out 90 degrees
    3. Extend arms horizontally
    4. Reach right hand toward the right shin or the floor
    5. The left arm points toward the ceiling
    6. Hold for 20–30 seconds, switch sides

    Height benefit: Stretches the lateral trunk muscles and intervertebral facet joints; improves lateral posture and reduces the sideways lean many people develop from carrying bags on one shoulder

    Category 3: Jumping and Plyometric Exercises (Best During Growth Years)

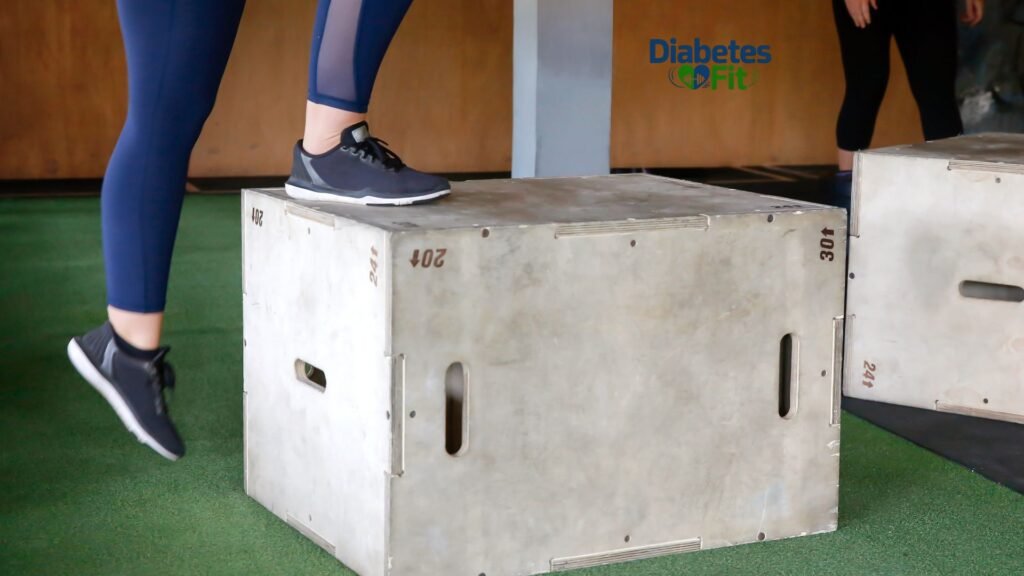
    For teenagers and young adults still in the growth phase, jumping exercises are among the most powerful stimulators of HGH and bone growth plate activity. These exercises should be a primary focus for anyone under 21 who wants to maximize height growth.
    Exercise for Height Increase

    Jump Rope

    Jumping rope — particularly high-intensity skipping — is one of the most effective exercises for height increase in growing adolescents. The repetitive impact and rebound stimulate bone growth in the lower legs and femur while triggering significant HGH release.

    Protocol:

    • Start with 2–3 minutes of continuous jumping
    • Build to 10–15 minutes per session
    • 4–5 sessions per week for maximum benefit
    • Can be done in intervals: 30 seconds on, 30 seconds rest × 10 rounds

    Vertical Jump Training

    The vertical jump is a maximal-effort explosive movement that produces one of the highest HGH responses of any exercise.

    How to do vertical jump training:

    1. Stand with feet shoulder-width apart
    2. Bend knees to a quarter-squat position
    3. Explode upward with maximum effort, swinging arms for momentum
    4. Land softly with bent knees
    5. Rest 3–5 seconds between jumps
    6. Perform 10–15 jumps per set, 3–4 sets

    Benefits for height increase: Stimulates HGH release, applies mechanical loading to growth plates, and strengthens leg muscles that support posture

    Basketball and Volleyball

    Both sports involve constant jumping, stretching, reaching, and high-intensity effort, making them among the most effective sports for height increase during growth years. This is not coincidental: data consistently show that basketball and volleyball players are among the tallest athletes across sports, influenced both by selection effects and by the height-supporting training these sports provide from youth.

    Category 4: Swimming (Best Full-Body Exercise for Height)

    Swimming is often cited as one of the best exercises for height increase, and the reasoning is legitimate. Swimming:

    • Involves full-body stretching with every stroke cycle
    • Decompresses the spine in the horizontal, weightless position (gravity is greatly reduced)
    • Stimulates HGH through sustained aerobic effort
    • Builds the back and core muscles essential for upright, tall posture
    • Applies gentle traction through the spine with movements like freestyle and backstroke

    Research suggests that swimmers tend to have longer torsos relative to their limb length compared to non-swimmers, partly from the spine’s response to the training environment.

    Best swimming styles for height increase:

    • Freestyle (front crawl) — full spinal extension on each stroke
    • Backstroke — extension through the chest and spine; excellent for counteracting forward posture
    • Breaststroke — strong lumbar extension component

    Recommended frequency: 3–4 sessions per week, 30–45 minutes per session

    Category 5: Core and Back Strengthening (Posture Foundation)

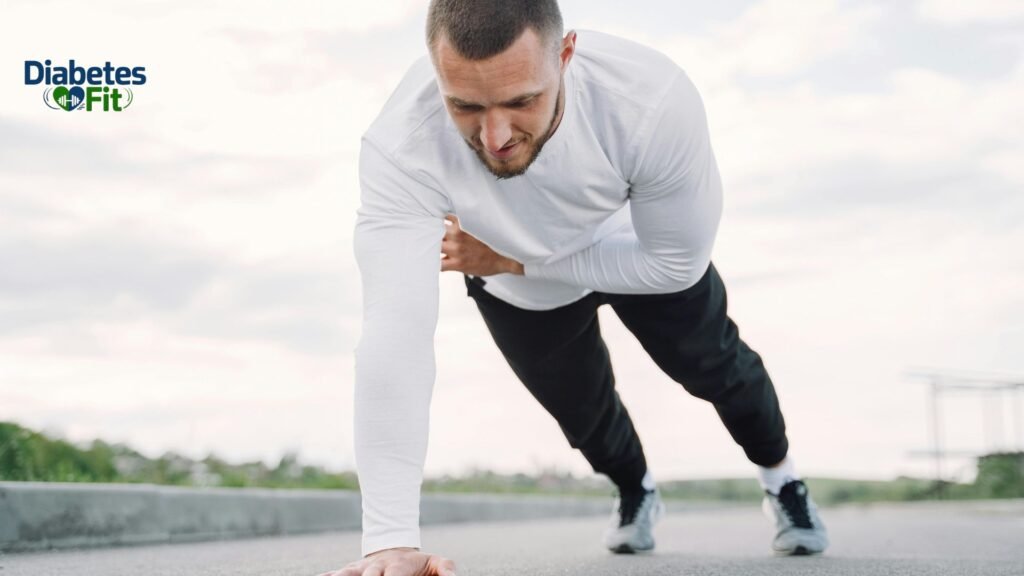
    These exercises build the muscular foundation that holds the spine in its tallest, most aligned position — making the height you have fully visible.
    Exercise for Height Increase

    Bird Dog

    How to do it:

    1. Start on hands and knees
    2. Extend the right arm forward and the left leg backward simultaneously
    3. Hold for 3–5 seconds — keep hips level, spine neutral
    4. Return and switch sides
    5. 10–12 reps per side, 3 sets

    Height benefit: Strengthens the deep spinal stabilizers and multifidus muscles that hold vertebrae in optimal alignment

    Superman Hold

    How to do it:

    1. Lie face down on a mat
    2. Simultaneously raise both arms (extended overhead) and both legs off the ground
    3. Hold for 5–10 seconds
    4. Lower slowly
    5. 10–15 reps, 3 sets

    Height benefit: Strengthens the entire posterior chain — the muscles that pull the spine upright and counteract the slouching that reduces height

    Wall Slide (Postural Reset)

    How to do it:

    1. Stand with your back against a wall — heels 2 inches away
    2. Press lower back, upper back, and back of head against the wall
    3. Arms at 90 degrees (like a goalpost), backs of arms touching the wall
    4. Slowly slide your arms up the wall as far as possible while maintaining contact
    5. Slide back down
    6. 10–15 reps

    Height benefit: Resets the shoulders into proper retracted position; corrects forward head posture; demonstrates and reinforces the standing posture that maximizes apparent height

    Sample Weekly Exercise Plan for Height Increase

    DayExercisesDurationFocus
    MondayDead hang × 5 sets + vertical jumps × 4 sets + cobra stretch30–35 minDecompression + HGH + spine
    TuesdaySwimming (freestyle + backstroke)40–45 minFull-body stretch + HGH
    WednesdayCat-cow + bird dog + superman hold + child’s pose25–30 minCore + spinal mobility
    ThursdayJump rope × 15 min + hanging twists + triangle pose30–35 minHGH stimulation + lateral stretch
    FridaySwimming or basketball40–45 minSport activity + HGH
    SaturdayFull yoga flow (cobra, cat-cow, child’s pose, triangle) + dead hang35–40 minDeep stretch + decompression
    SundayRest or gentle walk20–30 minRecovery

    Supporting Habits That Maximize Height Gains From Exercise

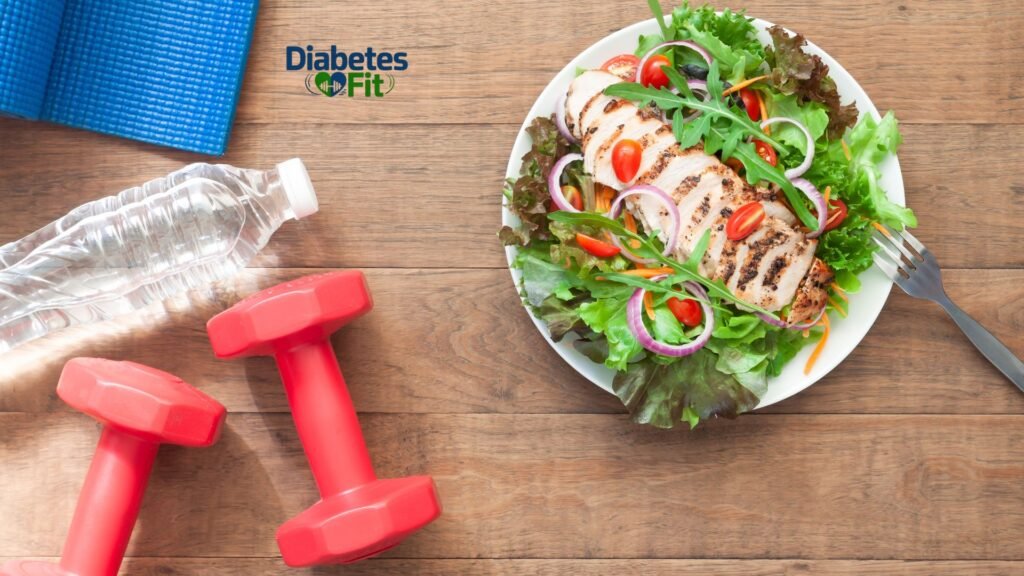
    Exercise alone doesn’t maximize height potential. These four supporting factors work together with exercise to produce the best results:
    Exercise for Height Increase

    1. Sleep 8–10 Hours (For Teenagers) or 7–9 Hours (For Adults)

    The most important factor after exercise. Human growth hormone is released in its largest pulses during deep sleep — particularly in the first 2 hours of sleep. Insufficient sleep drastically reduces HGH secretion. For teenagers actively trying to maximize height growth, adequate sleep is non-negotiable.

    2. Eat Adequate Protein and Calcium

    Bone growth requires raw materials. The two most critical nutrients are:

    • Protein (1.2–1.6g per kg body weight) — provides amino acids for bone matrix formation
    • Calcium (1,000–1,300mg per day for teenagers) — the primary mineral in bone structure
    • Vitamin D (600–2,000 IU per day) — required for calcium absorption and bone mineralization

    Best food sources: dairy products, eggs, salmon, leafy greens, tofu, beans, and fortified foods.

    3. Maintain Good Posture Consistently — Not Just During Exercise

    The postural habits you build through exercise need to carry over into daily life. Sitting and standing with proper alignment for 16 waking hours matters far more than 30 minutes of exercise. Practice standing against a wall, keep screens at eye level, and strengthen the habit of upright posture throughout the day.

    4. Avoid Smoking, Alcohol, and a Poor Diet During Growth Years

    Smoking reduces the blood supply to growth plates and suppresses HGH. Alcohol inhibits growth hormone secretion. Poor nutrition deprives bones of essential building materials. These factors are particularly damaging during the growth years when height potential is still being realized.

    Realistic Height Expectations From Exercise

    Age / StageRealistic Height Benefit From ExerciseMechanism
    Ages 10–15 (pre-peak growth)Maximum benefit — potentially 2–4 cm over the growth periodHGH stimulation + growth plate loading
    Ages 15–21 (peak and late growth)Moderate benefit — 1–3 cm potentialHGH + growth plate activity + posture
    Adults (growth plates closed)1–3 cm from the posture and decompressionPosture correction + spinal decompression
    Older adults with compressionUp to 2 cm restoredDisc rehydration + postural restoration

    Frequently Asked Questions

    Can exercise increase height after 18?

    After 18 — when most growth plates have closed — exercise cannot increase bone length. However, exercise can restore 1–3 cm of height in adults by correcting posture, decompressing the spine through hanging and swimming, and strengthening the core and back muscles that hold the spine in its tallest natural alignment. Many adults are measurably shorter than their potential height simply due to postural habits and spinal compression that regular exercise can reverse.

    Which exercise is best for height increase?

    The best exercises for height increase differ by age. For teenagers still growing, vertical jumping, jump rope, and swimming are most effective because they stimulate HGH and mechanically load the growth plates. For adults with closed growth plates, dead hangs, swimming, cobra stretch, and posture-building exercises (bird dog, superman, wall slides) are most effective because they decompress the spine and improve postural alignment. For maximum benefit at any age, combine decompression exercises with posture strengthening and adequate sleep.

    How long does it take to see results from exercise for height increase?

    Teenagers may notice measurable height increases within 3–6 months of regular exercise, proper nutrition, and sleep — reflecting actual bone growth. Adults working on posture and spinal decompression may notice visible height improvement within 4–8 weeks of consistent daily hanging, stretching, and core strengthening. Spinal disc decompression is a relatively quick process when exercised consistently — many people notice improved standing height within 2–3 weeks of daily dead hangs.

    Does skipping rope increase height?

    Yes — jump rope is one of the most effective exercises for height increase during the growth years. The repetitive jumping stimulates HGH secretion, applies beneficial mechanical loading to the growth plates of the legs and spine, and builds the leg strength and bone density that support height. Jump rope also improves cardiovascular fitness and coordination. For teenagers, 15–20 minutes of jump rope 4–5 times per week is a highly recommended addition to any height-increase exercise program.

    Does swimming increase height?

    Swimming is consistently regarded as one of the best exercises for height increase and is associated with taller-than-average stature in regular practitioners. Swimming decompresses the spine (horizontal position removes gravitational compression), stimulates HGH through sustained aerobic effort, fully stretches the entire body with each stroke, and builds back and core muscles that support tall, upright posture. Backstroke and freestyle are particularly effective for spinal extension. Regular swimming from childhood through adolescence is associated with above-average height development.

    Can yoga increase height?

    Yoga can increase apparent and measured height in adults by improving spinal decompression, correcting posture, and releasing muscular tension that compresses the vertebrae. Poses like cobra, cat-cow, downward dog, triangle, and child’s pose specifically target the spine and the muscles that influence standing height. Regular yoga (3–5 sessions per week) can restore 1–2 cm of compressed height in adults over 4–8 weeks. Yoga does not increase bone length in adults with closed growth plates, but its postural and decompressive effects are real and measurable.

    What foods support height increase alongside exercise?

    The most important nutrients for height increase during the growth years are: protein (for bone matrix formation — eggs, chicken, fish, lentils), calcium (for bone mineral density — dairy, leafy greens, tofu), vitamin D (for calcium absorption — sunlight, salmon, fortified milk), zinc (for growth factor activity — pumpkin seeds, beef, chickpeas), and magnesium (for bone structure — nuts, whole grains, legumes). Adequate caloric intake overall is also critical — undernourished teenagers consistently grow less than their genetic potential suggests they should.

    Conclusion

    The science is clear: exercise for height increase is genuinely effective — more so during the growth years, meaningfully so for adults, and always in the context of realistic expectations about what’s possible.

    For teenagers and young adults still growing, the right combination of jumping exercises, swimming, hanging, and posture work — supported by adequate sleep, protein, and calcium — can maximize the height their genetics allow and potentially push the upper limits of their growth potential. For adults whose growth plates have closed, exercise for height increase means recovering the 1–3 cm that poor posture and spinal compression have been stealing for years — often producing visible, measurable results within weeks.

    Start with the exercises most relevant to your age and situation. Teenagers: prioritize jumping, swimming, and sleep. Adults: prioritize dead hangs, swimming, yoga, and core strengthening for posture. Both groups: stand tall, eat well, and sleep enough — because exercise for height increase works best when the whole environment supports it.

    This article is for informational purposes only and does not replace advice from a qualified healthcare provider or certified fitness professional. If you have concerns about growth, height, or bone development, consult a pediatrician or endocrinologist for a personalized assessment.

    The National Institutes of Health (NIH) provides evidence-based information on human growth and development — including the role of growth hormone, genetics, and environmental factors in determining final height and healthy bone development.

  • Is Stretching Good for You? The Complete Truth About What Science Really Says

    Is Stretching Good for You? The Complete Truth About What Science Really Says

    You’ve probably been told your whole life to stretch — before exercise, after exercise, when you wake up, when you sit too long. But is stretching good for you? And more importantly, is it good for you in the specific ways you’ve been told? The honest answer is more nuanced — and more interesting — than a simple yes or no.

    Is stretching good for you? Yes — but the benefits are different from what most people assume, the timing matters significantly, and some types of stretching work far better than others for specific goals. The science on stretching has evolved considerably over the past two decades, and some long-held beliefs have been overturned entirely.

    In this complete guide, you’ll discover exactly what stretching does to your body, what the research genuinely supports, the different types and their specific benefits, when stretching helps and when it might not, and a practical daily stretching routine that produces real results.

    Skin care is also important, so know how to Make Your Skin Glow Naturally at Home.

    Is Stretching Good for You? What Happens in Your Body When You Stretch

    In order to accurately determine whether stretching is beneficial for you, we must comprehend what happens inside your body during a stretch.

    Stretching’s Physiology

    When you stretch a muscle, multiple things happen at once:

    Within the actual muscle:

    • The fundamental contractile units of muscle fibers, called sarcomeres, are drawn to their greatest length.
    • Muscle fibers contain titin, a massive elastic protein that stretches and stores elastic energy.
    • The fascia, tendons, and ligaments that surround the muscle gradually extend.
    • The muscle’s mechanoreceptors sense the stretch and communicate it to the neurological system.

    Within the nervous system:

    • When a muscle is pulled, the stretch reflex first kicks in, causing the muscle to momentarily contract.
    • Autogenic inhibition happens with prolonged stretching; the Golgi tendon organs sense high muscle tension and trigger protective muscle relaxation.
    • Regular stretching seems to improve the nervous system’s stretch tolerance over time, allowing you to endure the same stretch duration with less discomfort.

    This final element is really important: According to recent research, stretching increases flexibility mostly through neurological processes, such as educating your neural system to allow for more range of motion, rather than just mechanical elongation of muscle fibers.

    This knowledge directly influences when and how stretching is most advantageous, which is essential to provide a practical answer to the question of whether stretching is beneficial for you.

    The 5 Main Types of Stretching — What Each One Does

    Understanding the different types of stretching is essential for answering whether stretching is good for you for any specific purpose:

    TypeDescriptionBest TimingPrimary Benefit
    Static stretchingHold a stretch for 15–60+ secondsAfter exercise, anytimeFlexibility, relaxation, recovery
    Dynamic stretchingControlled movements through the range of motionBefore exercise, warm-upMobility, performance preparation
    Ballistic stretchingBouncing or jerking movementsAdvanced athletes onlyPower sport preparation
    PNF stretchingContract-relax technique with a partner or bandAdvanced flexibility workFastest flexibility gains
    Active stretchingHolding a stretch using only your own muscle strengthAny timeActive flexibility, joint stability

    Is Stretching Good for You? 12 Science-Backed Benefits

    1. Improves Flexibility and Range of Motion

    This is the most well-established benefit of stretching — and the foundation of why stretching is good for you for long-term physical function.

    Is Stretching Good for You

    The research:

    A systematic review in Sports Medicine analyzing 23 studies found that regular static stretching (performed daily or multiple times per week) significantly increased joint range of motion over 4–12 weeks, with the greatest gains in those who were initially least flexible.

    Why range of motion matters:

    • Reduces compensatory movement patterns that lead to injury
    • Allows joints to function through their full intended range
    • Makes everyday activities (bending, reaching, squatting) easier and safer
    • Enables more effective strength training through a full range of motion movements

    How much stretching is needed: Research suggests holding stretches for at least 30 seconds per muscle group, repeated 2–4 times, at least 5 days per week, produces meaningful flexibility improvement over 4–8 weeks.

    2. Reduces Muscle Tension and Chronic Tightness

    One of the most immediately felt answers to whether stretching is good for you is its effect on muscle tension — that persistent tightness in the neck, shoulders, hips, and lower back that affects millions of people who sit for long periods.

    How it works:

    Prolonged sitting creates adaptive shortening — muscles shorten at their functional length to become efficient at the position you hold most. The hip flexors, hamstrings, chest, and neck muscles are particularly affected.

    Regular stretching:

    • Reduces the resting tension in chronically shortened muscles
    • Improves the length-tension relationship — restoring muscles to their optimal functional length
    • Reduces the myofascial trigger points (knots) that create referred pain and discomfort
    • Signals the nervous system to reduce protective muscle guarding in habitually tight areas

    3. Reduces Lower Back Pain

    Lower back pain affects approximately 80% of adults at some point — and is stretching good for you for this incredibly common problem? Yes — particularly when targeted at the right muscle groups.

    Research evidence:

    A study published in the Journal of Physical Therapy Science found that a structured stretching program targeting the hip flexors, hamstrings, and piriformis significantly reduced chronic lower back pain over 4 weeks — improving both pain scores and functional disability.

    A Cochrane Review found that stretching exercises, particularly when combined with strengthening, produced meaningful improvements in both acute and chronic low back pain.

    Why it helps lower back pain:

    • Tight hip flexors pull the pelvis into anterior tilt — compressing the lumbar spine. Stretching hip flexors reduces this compression
    • Tight hamstrings reduce pelvic mobility — increasing lumbar spine stress during forward bending. Stretching hamstrings restores normal lumbar mechanics
    • Tight piriformis compresses the sciatic nerve — causing the buttock and leg pain (sciatica) often blamed on spinal disc problems
    • Thoracic spine stiffness forces the lumbar spine to compensate with excess mobility — stretching the thoracic spine reduces lumbar overload

    4. Improves Posture

    Poor posture — rounded shoulders, forward head position, increased lumbar lordosis — is largely a flexibility problem. Muscles that are too short in some areas and too lengthened (and therefore weak) in others create the characteristic poor posture patterns of modern sedentary life.

    Is Stretching Good for You

    Is stretching good for you for posture? Yes:

    • Stretching the chest (pectoralis minor) reduces rounded shoulder posture
    • Stretching the hip flexors reduces anterior pelvic tilt
    • Stretching the upper trapezius and levator scapulae reduces the shoulder elevation and neck tension that creates the “tense” posture
    • Stretching the thoracic spine improves the natural spinal curves

    Important caveat: Stretching alone isn’t enough for posture correction — the weakened muscles on the opposite side (posterior chain, deep core, mid-back) need to be strengthened simultaneously. Stretching tight muscles while strengthening their antagonists produces the most effective posture improvement.

    5. Reduces Stress and Promotes Relaxation

    Is stretching good for you for mental health and stress? The evidence is genuinely compelling — and often overlooked in discussions focused on physical performance.

    The physiological mechanism:

    Stretching activates the parasympathetic nervous system — the body’s “rest and digest” mode — through several pathways:

    • Slow, sustained stretching with deep breathing directly stimulates the vagus nerve — the primary parasympathetic nerve that slows heart rate and reduces cortisol
    • The physical relief of muscle tension provides immediate sensory comfort that the nervous system interprets as safety
    • The mindful attention required for effective stretching activates the same neurological pathways as meditation

    Research evidence:

    A study published in Complementary Therapies in Medicine found that a 12-week stretching program significantly reduced self-reported anxiety, improved sleep quality, and reduced perceived stress — comparable to other mind-body interventions.

    6. Improves Circulation and Cardiovascular Health

    Is stretching good for you for heart health? This is one of the most surprising findings in recent stretching research.

    A study published in the Journal of Physiology found that passive static stretching of the calf muscles for 40 minutes per day for 12 weeks:

    • Reduced arterial stiffness by 9.4%
    • Improved vascular compliance — the ability of blood vessels to expand and contract
    • Reduced diastolic blood pressure meaningfully

    Why blood vessels respond to stretching:

    Blood vessels are surrounded by smooth muscle and connective tissue — both of which respond to the mechanical stimulus of stretching by becoming more compliant. This arterial flexibility is a direct cardiovascular health benefit, independent of aerobic exercise.

    Additional circulatory benefits:

    • Increases local blood flow to stretched muscles — improving nutrient delivery and waste removal
    • Reduces muscle soreness by improving clearance of metabolic byproducts
    • Supports recovery from exercise by maintaining tissue perfusion

    7. Enhances Athletic Performance — When Done Correctly

    Is stretching good for you before exercise? The answer here is more nuanced than most people realize — and it depends entirely on which type of stretching you do.

    Is Stretching Good for You

    Static stretching before exercise:

    Research has consistently shown that static stretching immediately before strength or power activities can reduce performance:

    • Reduces muscle strength by 5–8%
    • Reduces power output by up to 8%
    • Temporarily impairs proprioception (balance and coordination)
    • Reduces muscle stiffness needed for explosive movements

    These effects are temporary (returning within 10–15 minutes) and primarily relevant to athletes performing maximal strength, speed, or power activities. For recreational exercisers doing moderate activity, the impact is minimal.

    Dynamic stretching before exercise:

    Dynamic stretching — controlled movements through the range of motion — does the opposite:

    • Increases muscle temperature and blood flow
    • Improves neuromuscular activation and coordination
    • Enhances joint range of motion without reducing force production
    • Primes the nervous system for athletic movement

    The evidence-based recommendation:

    • Before exercise: Dynamic stretching (leg swings, arm circles, controlled lunges, hip rotations)
    • After exercise: Static stretching (when muscles are warm and pliable, performance is not a concern)

    8. Reduces Injury Risk — With Important Nuances

    Is stretching good for you for injury prevention? The research here is more mixed than most fitness guidance suggests.

    What the research actually shows:

    A systematic review in the British Medical Journal found that stretching before exercise does NOT significantly reduce overall injury risk. This overturned decades of conventional wisdom.

    What reduces injury risk:

    • Appropriate warm-up (increasing temperature and blood flow)
    • Progressive training load management
    • Adequate strength through a full range of motion
    • Neuromuscular control and coordination

    Where stretching DOES help with injury prevention:

    • Chronically tight muscles — particularly hip flexors, calves (preventing Achilles tendon issues), and hamstrings — increase injury risk over time when shortened
    • Regular stretching that improves habitual flexibility and range of motion does reduce chronic overuse injury risk
    • Post-exercise stretching may reduce the severity of delayed onset muscle soreness (DOMS)

    9. Improves Sleep Quality

    Is stretching good for you for sleep? Yes — particularly when done in the evening.

    Research support:

    A study in the Journal of Physiological Anthropology found that moderate stretching in the evening:

    • Reduced sleep onset latency (time to fall asleep) by 15–30%
    • Improved subjective sleep quality
    • Reduced nighttime cortisol levels

    The mechanism:

    The parasympathetic activation and physical relaxation from stretching prepares the body physiologically for sleep — reducing the muscle tension and elevated nervous system arousal that prevent sleep onset.

    A 10–15 minute stretching routine before bed — particularly targeting the neck, shoulders, hips, and lower back — is one of the most accessible and effective natural sleep improvement strategies available.

    10. Supports Joint Health and Reduces Arthritis Discomfort

    Is stretching good for you if you have arthritis or joint pain? Research consistently says yes — with appropriate modifications.

    Is Stretching Good for You

    How stretching supports joint health:

    • Maintains the cartilage-lubricating synovial fluid distribution through joint surfaces
    • Preserves the range of motion that arthritis progressively reduces
    • Reduces the muscle tightness around affected joints that amplifies pain
    • Research shows stretching helps maintain functional independence and reduces pain scores in osteoarthritis patients

    Important modifications for joint conditions:

    • Avoid forcing range of motion — work to the edge of comfortable movement only
    • Warm joints gently before stretching — warm water, heat pack, or light movement
    • Focus on gentle, sustained holds (30–60 seconds) rather than forcing range
    • Consult a physiotherapist for condition-specific stretching guidance

    11. Reduces Headache Frequency

    Is stretching good for you specifically for headaches? For tension-type headaches — the most common type — the answer is a meaningful yes.

    The connection between muscle tension and headaches:

    Tension headaches are caused or worsened by sustained muscle tension in the suboccipital muscles (base of skull), upper trapezius (shoulders), and cervical extensors (back of neck). This tension reduces blood flow and compresses the nerves and vessels that supply the head.

    Regular stretching of these muscles:

    • Reduces the chronic muscle tension that triggers tension headaches
    • Improves cervical range of motion
    • Reduces the sensitivity of myofascial trigger points that refer pain into the head

    Research evidence: A study published in Cephalalgia found that a structured neck and shoulder stretching program reduced tension headache frequency by 69% over 4 weeks.

    12. Promotes Healthy Aging and Maintains Functional Independence

    Is stretching good for you as you age? The evidence here may be the most compelling of all — because the consequences of not stretching become increasingly significant with age.

    What happens to flexibility with age:

    • Collagen in connective tissue becomes less elastic and more cross-linked
    • Muscle fiber length decreases — muscles become functionally shorter
    • Reduced physical activity accelerates flexibility loss
    • By age 70, average adults have lost 30–40% of their peak flexibility

    Why this matters for function:

    Lost flexibility leads to:

    • Falls risk from reduced ankle dorsiflexion and hip mobility
    • Difficulty with activities of daily living (dressing, reaching, bending)
    • Increased joint pain from reduced range of motion
    • Compensatory movement patterns that cause secondary pain and injury

    Research on older adults and stretching:

    Multiple studies show that older adults who maintain regular stretching programs preserve functional independence, reduce fall risk, and significantly improve quality of life — regardless of other forms of exercise.

    When Is Stretching NOT Good for You?

    Complete honesty about is stretching good for you requires acknowledging when it’s not:

    Situations where stretching should be avoided or modified:

    SituationWhyWhat to Do Instead
    Immediately before maximal strength/power exerciseReduces force production temporarilyUse a dynamic warm-up instead
    On an injured muscle (acute injury, < 48 hours)Can worsen inflammation and tissue damageRest, ice, compress
    Hypermobile jointsFurther stretching increases instabilityFocus on strengthening
    Overstretching sensation (sharp pain)Signals tissue damageStop immediately
    Nerve pain (radiating pain)May worsen nerve irritationSee a physiotherapist
    Active infection or inflammationWorsens the inflammatory responseRest until resolved

    The “no pain, no gain” myth:

    Stretching should create a mild to moderate pulling sensation — never sharp pain. Pain is the nervous system signaling tissue stress or damage. Stretching to the point of pain consistently damages muscle and connective tissue rather than improving flexibility.

    The Most Effective Stretching Protocol — Based on Research

    Daily stretching routine for general health benefits:

    StretchTargetHold TimeReps
    Hip flexor stretch (kneeling lunge)Hip flexors, quads45–60 seconds3 on each side
    Hamstring stretch (seated or standing)Hamstrings, lower back45–60 seconds3 on each side
    Piriformis stretch (figure-4 or pigeon)Piriformis, hips45–60 seconds3 on each side
    Chest opener (doorway or arms clasped behind)Pectorals, shoulders30–45 seconds3
    Thoracic spine rotationMid-back, thoracic rotation30–45 seconds3 each side
    Calf stretch (wall stretch)Calves, Achilles45–60 seconds3 each side
    Neck side bendUpper trapezius, neck30 seconds3 each side
    Child’s poseLower back, hips60–90 seconds2

    Total time: 20–25 minutes Frequency: Daily (minimum 5 times per week for meaningful flexibility improvement) Best timing: Anytime — but particularly after exercise or in the evening for relaxation and sleep benefits

    Static vs. Dynamic Stretching: When to Use Each

    FactorStatic StretchingDynamic Stretching
    Best timingAfter exercise, before bedBefore exercise, warm-up
    Primary benefitFlexibility, relaxationMobility, performance prep
    Muscle temperature requiredWarm is bestWorks on cool muscles
    Sports performance impactMay reduce if done beforeEnhances performance
    Injury preventionLong-term benefitAcute warm-up benefit
    Duration30–60 seconds per stretch10–12 controlled reps

    Frequently Asked Questions 

    Is it beneficial for you to stretch every day? 

    Yes, most people benefit from everyday stretching, which actually improves flexibility and range of motion more effectively than less frequent stretching. Stretching five to seven days a week improves flexibility considerably more than stretching two to three days a week, according to research. People who sit for extended periods of time, elderly folks attempting to retain functional mobility, and anybody with persistent muscular stiffness or postural issues can all benefit from daily stretching. Stretching to a comfortable pull, never to discomfort, and avoiding static stretching right before intense exercise are crucial.

    Is it true that stretching increases flexibility?

    Indeed, frequent, consistent stretching increases flexibility in a quantifiable way. According to research, joint range of motion significantly improves after 4–8 weeks of daily static stretching (30+ seconds per muscle group, 2–4 repetitions). It is interesting to note that rather than being only the result of mechanical muscle fiber elongation, recent research indicates that a large portion of this increase is neurological—your nervous system learns to tolerate a larger range of motion with less discomfort. You are exercising your nervous system just as much as your muscles, which is why consistency is so important.

    Is it beneficial to stretch before or after working out?

    There is compelling evidence to encourage stretching in various ways, both before and after exercise. Dynamic stretching, which involves controlled range-of-motion exercises like arm circles, leg swings, and controlled lunges, is helpful before exercise because it improves mobility, warms muscles, boosts circulation, and primes the neurological system without compromising strength or power. Static stretching (holding positions for 30+ seconds) is most beneficial after exercise — when muscles are warm and pliable, flexibility gains are maximized, and reducing post-exercise tension supports recovery. Doing static stretching before maximal strength or power activities can temporarily reduce force production by 5–8%.

    Can pain be lessened by stretching?

    Yes, stretching works in a variety of ways to lessen various kinds of pain. Stretching the hamstrings and hip flexors helps ease lower back pain by lowering the mechanical strain on the lumbar spine. Stretching the neck and upper trapezius muscles relieves the tension that causes and sustains headaches. Stretching after exercise may lessen the intensity of DOMS for general muscle soreness. Regular, mild stretching for arthritis preserves joint range of motion and lessens the stiffness in the muscles that exacerbates joint pain. Does stretching help you manage your pain? Yes, especially in cases of tension-related and musculoskeletal pain.

    How long should you hold a stretch to reap the rewards? 

    Static stretches should be held for at least 30 seconds, according to research, with 45–60 seconds yielding the greatest flexibility gains per session. According to a 2015 meta-analysis, most groups responded just as well to 30-second holds as to lengthier ones; however, older persons and those with severe tightness might benefit from durations of up to 60–90 seconds. Whether you employ one lengthy hold or several shorter holds is less important than the overall amount of time you stretch each muscle group during a session. Over the course of 4–8 weeks of daily practice, three repeats of 30 seconds equals 90 seconds of total stretch time, which typically results in significant gains in range of motion.

    If you are not working out, is stretching beneficial for you? 

    Even for those who do not engage in other types of exercise, stretching has significant health benefits. Stretching specifically targets the adaptive shortening of the chest muscles, hamstrings, and hip flexors that results from extended sitting for inactive people. Stretching reduces arterial stiffness, which enhances cardiovascular health without the need for aerobic exercise, according to research. It maintains functional mobility, eases lower back pain, enhances posture, and encourages rest and good sleep. A daily stretching regimen has significant health benefits that promote both physical and emotional well-being for those who are unable to exercise intensely because of medical issues or physical restrictions.

    Can excessive stretching be detrimental?

    There is a genuine and underestimated risk associated with overstretching. Stretching to the point of discomfort regularly harms connective tissue and muscle fibers, and can irritate nerves over time, which has the reverse effect of what was intended. Another issue is hypermobility: excessive stretching can damage persons with already loose joints, which are common in women and those with connective tissue disorders like Ehlers-Danlos syndrome. This is because aggressive stretching further destabilizes already-lax joints. Stretching to a comfortable tension is the safest and most efficient method; you should feel a pull but never a harsh pain. When done properly, is stretching beneficial for you? Absolutely. Do you feel better when you are pushed outside your comfort zone? No, that is when it starts to be dangerous. 

    Conclusion

    After analyzing all the data, the answer to the question of whether stretching is healthy for you is unquestionably yes, albeit there are significant subtleties regarding timing, style, and technique that affect how beneficial it truly is.

    Does stretching help you become more flexible? Yes, provided that each muscle group is regularly worked out for at least 30 seconds each day. Is it beneficial to stretch before working out? Yes, but before engaging in high-intensity exercise, stretch dynamically rather than with static holds. Are lower back pain, stress, sleep, posture, and cardiovascular health all improved by stretching? Yes, all of these advantages are supported by research when stretching is done appropriately and often.

    In a larger sense, is stretching beneficial to your overall health? Without a doubt. After weeks of regular practice, a 20-minute daily stretching regimen that does not cost anything, does not require any equipment, and can be done anywhere results in quantifiable improvements in flexibility, pain, posture, stress, sleep, and cardiovascular health.

    Get started right now. Select three stretches from this guide’s daily practice; the chest opener, hamstring stretch, and hip flexor stretch are the most effective for most people. For 45 seconds, hold each. Before going to bed tonight, do it. Then repeat the process tomorrow. Your body will reward you with improved mobility, reduced pain, and increased ease in all you do if you develop the habit, stretch by stretch.

    Disclaimer: This material should not be used in place of expert medical or physiotherapy advice; it is merely meant to be informative. Before starting a new stretching program, always speak with a trained healthcare professional especially if you have existing injuries, joint conditions, or chronic pain.

    You can also read more benefits from Healthline.

  • Yoga to Reduce Belly Fat for Females at Home: 15 Powerful Poses That Actually Work

    Yoga to Reduce Belly Fat for Females at Home: 15 Powerful Poses That Actually Work

    Belly fat is one of the most frustrating problems women face — and if you’ve been looking for a gentle but effective solution, yoga to reduce belly fat for females at home might be exactly what you need. Unlike intense gym workouts, yoga works with your body — building core strength, reducing stress hormones that cause belly fat, improving digestion, and burning calories — all from the comfort of your own home.

    The best part? You don’t need any equipment, a gym membership, or hours of free time. Just a yoga mat, some open floor space, and the right poses done consistently can make a real, visible difference in your waistline.

    In this article, you’ll find 15 powerful yoga poses specifically chosen for belly fat reduction in women, the science behind why yoga works, a complete daily routine, tips for faster results, and honest answers to the most common questions. Let’s begin.

    Along with following a healthy lifestyle, choosing the right foods is essential—read our guide Are Blueberries Good for Diabetics? to learn about smart fruit choices.

    Why Yoga Works for Reducing Belly Fat in Women

    Before diving into the poses, it’s important to understand why yoga to reduce belly fat for females at home is so effective — because it works through multiple pathways that most people don’t know about.

    1. Yoga Reduces Cortisol — The Primary Belly Fat Hormone

    This is the most important mechanism — and the one that makes yoga uniquely powerful for women specifically.

    Cortisol is your body’s primary stress hormone. When chronically elevated — due to work pressure, poor sleep, emotional stress, or hormonal changes — cortisol directly signals your body to store fat in the abdominal area. This is why stressed women often gain belly fat even without overeating.

    Research published in the Journal of Alternative and Complementary Medicine found that regular yoga practice significantly reduced salivary cortisol levels compared to control groups. By reducing cortisol, yoga to reduce belly fat for females at home addresses the root hormonal cause of abdominal fat storage — not just the symptom.

    2. Yoga Builds Core Strength Without Impact

    Many yoga poses — especially twists, planks, boat pose, and warrior variations — engage the deep core muscles, including the transverse abdominis, obliques, and rectus abdominis. Strengthening these muscles:

    • Creates a flatter, more toned abdominal appearance
    • Improves posture, which makes the belly look slimmer immediately
    • Supports fat loss by building metabolism-boosting lean muscle
    • Reduces lower back pain that can prevent women from doing other exercises

    3. Yoga Improves Digestion and Reduces Bloating

    Many poses in yoga to reduce belly fat for females at home directly massage the digestive organs, stimulate bowel movement, and reduce bloating — giving you a visibly flatter stomach even before significant fat loss occurs.

    Twisting poses compress and release the intestines, promoting peristalsis. Forward folds compress the abdominal organs. Inversions improve circulation to the digestive tract. Together, these effects significantly reduce digestive bloating — one of the most common causes of a protruding belly in women.

    4. Yoga Burns Calories and Supports Weight Loss

    A 60-minute yoga session burns approximately:

    Yoga StyleCalories Burned (60 min, 65kg woman)
    Gentle/Restorative Yoga120–180 kcal
    Hatha Yoga175–250 kcal
    Vinyasa Flow Yoga300–450 kcal
    Power Yoga350–500 kcal
    Hot Yoga (Bikram)400–600 kcal
    Ashtanga Yoga350–500 kcal

    For yoga to reduce belly fat for females at home, a vigorous Vinyasa or Power Yoga session burns a meaningful number of calories — especially when practiced 5–6 days per week.

    5. Yoga Balances Hormones — Critical for Women

    Women’s bodies are particularly sensitive to hormonal fluctuations that affect fat storage — especially estrogen, insulin, and cortisol. Yoga supports hormonal balance by:

    • Reducing cortisol (belly fat storage hormone)
    • Improving insulin sensitivity (reduces blood sugar spikes and fat storage)
    • Supporting thyroid function through specific poses like shoulder stand and fish pose
    • Reducing the impact of menopause-related hormonal changes that shift fat to the abdomen

    This hormonal balancing effect makes yoga to reduce belly fat for female at home especially powerful compared to other forms of exercise that primarily address calorie burning alone.

    15 Best Yoga Poses to Reduce Belly Fat for Females at Home

    1. Boat Pose (Navasana)

    Target area: Core, hip flexors, lower abs Hold time: 20–40 seconds | Sets: 3–5

    Boat pose is one of the most direct core-strengthening poses in all of yoga — and the single most important pose in yoga to reduce belly fat for females at home.

    How to do it:

    • Sit on your mat with knees bent and feet flat on the floor
    • Lean back slightly until you feel your core engage
    • Lift your feet off the floor, shins parallel to the ground (easier version) or legs straight (advanced)
    • Extend your arms forward, parallel to the floor
    • Hold, breathing steadily — your body forms a V shape
    • Lower slowly and repeat

    Why it works: Boat pose activates the rectus abdominis (six-pack muscles), transverse abdominis (deep core), and hip flexors simultaneously. Studies show that isometric core contractions like this build deep abdominal strength more effectively than crunches.

    Modification: Keep knees bent if you feel lower back strain. Straighten legs as you get stronger.

    2. Plank Pose (Phalakasana)

    Target area: Full core, shoulders, glutes Hold time: 20–60 seconds | Sets: 3–5

    Yoga to Reduce Belly Fat for Females at Home

    The plank is the foundation of core strength in yoga to reduce belly fat for females at home. It looks simple, but it activates nearly every muscle in your body simultaneously.

    How to do it:

    • Start on hands and knees
    • Walk your feet back until your body forms a straight line from head to heels
    • Hands directly under shoulders, fingers spread wide
    • Engage your core — imagine pulling your belly button toward your spine
    • Keep hips level — don’t let them sag or rise
    • Hold for as long as you can with good form

    Why it works: Plank activates the transverse abdominis — the deepest layer of abdominal muscle that acts like a natural corset, pulling the waist inward. Research from Harvard Medical School identified the plank as one of the most effective core exercises available.

    Progression: Side plank, plank with alternating leg lifts, forearm plank.

    3. Warrior III (Virabhadrasana III)

    Target area: Core, glutes, hamstrings, balance. Hold time: 20–30 seconds each side | Sets: 3 each side

    Warrior III is a dynamic balance pose that forces your entire core to work intensely to maintain stability — making it one of the most effective belly-flattening poses in yoga to reduce belly fat for females at home.

    How to do it:

    • Stand on one foot, hinging forward at the hips
    • Extend the other leg straight behind you until your body is parallel to the floor
    • Arms can extend forward, rest on the hips, or be pressed together at the heart center
    • Engage your core strongly to maintain balance
    • Hold, then switch sides

    Why it works: Balance poses like Warrior III activate the stabilizing muscles of the core continuously throughout the hold — burning more calories and building more functional strength than static poses.

    4. Twisted Chair Pose (Parivrtta Utkatasana)

    Target area: Obliques, core, legs, digestive organs. Hold time: 20–30 seconds each side | Sets: 3 each side

    This powerful twisting pose combines the leg-strengthening benefits of Chair Pose with the core-targeting and digestive benefits of a twist — a perfect combination for yoga to reduce belly fat for females at home.

    How to do it:

    • Stand with feet together, bend knees as if sitting in a chair
    • Bring your hands together at the heart center
    • Twist your torso to the right, hooking your left elbow outside your right knee
    • Push the elbow and knee gently against each other to deepen the twist
    • Hold, then switch sides

    Why it works: The twisting action compresses and releases the digestive organs, improving gut motility and reducing bloating. The squat position strongly activates the legs and glutes, burning additional calories.

    5. Cobra Pose (Bhujangasana)

    Target area: Lower back, abdominals (stretch), spine Hold time: 20–30 seconds | Sets: 3–4

    Cobra pose strengthens the back muscles that support your core, improves posture that makes the belly appear flatter, and provides a deep stretch to the abdominal muscles — making it an essential counterpose in yoga to reduce belly fat for females at home.

    How to do it:

    • Lie face down on your mat, palms flat under your shoulders
    • Press the tops of your feet and thighs into the mat
    • On an inhale, press your hands into the mat and lift your chest up and forward
    • Keep your elbows slightly bent — don’t lock them
    • Roll your shoulders back and down, away from your ears
    • Hold and breathe deeply

    Why it works: Cobra stretches the abdominal muscles after strengthening poses, reducing tension and improving flexibility. The back strengthening reduces the anterior pelvic tilt that makes bellies appear to protrude forward in many women.

    6. Bow Pose (Dhanurasana)

    Target area: Entire abdomen, back, chest Hold time: 15–25 seconds | Sets: 3

    The bow pose is one of the most comprehensive abdominal poses in yoga to reduce belly fat for females at home. The entire front of your body — including the stomach — receives a deep stretch and activation simultaneously.

    How to do it:

    • Lie face down on your mat
    • Bend your knees and reach back to grab your ankles with both hands
    • On an inhale, kick your feet back and up while lifting your chest off the mat
    • Your body should form a bow shape — only your abdomen touches the mat
    • Hold, breathing steadily
    • Release slowly and repeat

    Why it works: Bow pose massages the abdominal organs, stimulates digestion, stretches the entire front body, and strengthens the back muscles that support good posture — addressing belly fat from multiple angles simultaneously.

    7. Bridge Pose (Setu Bandha Sarvangasana)

    Target area: Glutes, core, hamstrings, lower back. Hold time: 30–45 seconds | Sets: 3–4

    The bridge pose is a foundational pose in yoga to reduce belly fat for females at home that builds glute and core strength while improving hormonal balance through gentle inversion.

    How to do it:

    • Lie on your back with knees bent, feet flat on the floor, hip-width apart
    • Press your feet and arms into the mat
    • Lift your hips toward the ceiling, squeezing your glutes at the top
    • Interlace your fingers under your back and press your arms down
    • Hold at the top, keeping your core engaged
    • Lower slowly, vertebra by vertebra

    Why it works: Bridge pose activates the glutes, hamstrings, and core simultaneously. It also gently stimulates the thyroid through the mild neck flexion — supporting the metabolic function that affects belly fat accumulation.

    8. Wind-Relieving Pose (Pavanamuktasana)

    Target area: Digestive system, lower abs, lower back. Hold time: 30–60 seconds each side | Sets: 2–3

    Yoga to Reduce Belly Fat for Females at Home

    The name says it all. This pose is specifically designed to relieve digestive gas and bloating — one of the most common causes of belly distension in women.

    How to do it:

    • Lie on your back and draw one knee into your chest
    • Wrap both hands around your shin, pulling the knee closer
    • Tuck your chin slightly toward your chest
    • Hold, then switch legs, then bring both knees together

    Why it works: The compression of the knee against the abdomen directly massages the ascending and descending colon, releasing trapped gas, improving bowel movement, and visibly flattening the belly by reducing bloating. An essential pose in yoga to reduce belly fat for females at home for digestive health.

    9. Seated Forward Bend (Paschimottanasana)

    Target area: Hamstrings, lower back, abdominals (compression) Hold time: 30–60 seconds | Sets: 3

    Seated forward bend compresses the abdominal organs with each exhale, massaging the digestive system and stimulating metabolism — a gentle but powerful tool in yoga to reduce belly fat for females at home.

    How to do it:

    • Sit with legs extended straight in front of you
    • Sit tall on an inhale, lengthening your spine
    • On an exhale, hinge forward from your hips — not your waist
    • Reach your hands toward your feet (hold shins, ankles, or feet — wherever you reach)
    • With each exhale, fold a little deeper
    • Hold, breathing deeply into the belly

    Why it works: Each exhale in this pose creates a compression of the abdominal organs that stimulates digestion and organ function. Regular practice also reduces stress and cortisol — addressing the hormonal root of belly fat storage.

    10. Child’s Pose (Balasana)

    Target area: Lower back, hips, stress reduction, digestive organs. Hold time: 1–3 minutes | Sets: As needed

    Child’s pose is the most restorative pose in yoga to reduce belly fat for females at home. It seems passive, but its stress-reducing and cortisol-lowering effects are powerful for belly fat reduction.

    How to do it:

    • Kneel on your mat, big toes touching, knees wide apart
    • Sit your hips back toward your heels
    • Extend your arms forward on the mat, forehead resting on the ground
    • Breathe deeply, feeling your belly press against your thighs on each inhale
    • Hold as long as needed — minimum 1 minute for relaxation benefits

    Why it works: Child’s pose activates the parasympathetic nervous system (rest and digest) — directly lowering cortisol and adrenaline. Since elevated cortisol is the primary hormonal driver of belly fat in women, regular child’s pose practice is surprisingly powerful for abdominal fat reduction over time.

    11. Camel Pose (Ustrasana)

    Target area: Abdomen, chest, hip flexors, spine Hold time: 20–30 seconds | Sets: 3

    Camel pose provides one of the deepest stretches to the entire front of the body — including the abdominal muscles — while also stimulating the digestive organs and thyroid.

    How to do it:

    • Kneel with knees hip-width apart
    • Place your hands on your lower back, fingers pointing down
    • Slowly lean back, opening your chest toward the ceiling
    • If comfortable, reach your hands back to hold your heels
    • Let your head drop back gently (or keep your chin tucked if you have neck issues)
    • Hold, breathing deeply

    Why it works: The deep backbend stretches the hip flexors, which are chronically shortened in women who sit for long periods. Tight hip flexors create an anterior pelvic tilt that makes the belly protrude. Releasing them with the camel pose visibly flattens the belly by correcting posture.

    12. Downward Facing Dog (Adho Mukha Svanasana)

    Target area: Full body, core, hamstrings, shoulders, calorie burning. Hold time: 30–60 seconds | Sets: 3–5

    Downward dog is one of the most commonly practiced poses in all of yoga, and a powerful full-body activator in yoga to reduce belly fat for females at home.

    How to do it:

    • Start on hands and knees
    • Tuck your toes and press your hips up and back
    • Your body forms an inverted V shape
    • Press your hands firmly into the mat, spreading fingers wide
    • Try to lower your heels toward the floor (they don’t need to touch)
    • Engage your core and relax your head between your arms

    Why it works: Downward dog activates the arms, shoulders, core, back, hamstrings, and calves simultaneously. As a mild inversion, it also improves circulation to the abdominal organs and supports digestive function.

    13. Triangle Pose (Trikonasana)

    Target area: Obliques, side waist, hamstrings, hips. Hold time: 30 seconds each side | Sets: 3 each side

    Triangle pose targets the obliques — the side abdominal muscles — that are responsible for the waistline definition that creates an hourglass shape. It’s one of the best poses for waist slimming in yoga to reduce belly fat for females at home.

    How to do it:

    • Stand with feet wide apart (about 4 feet)
    • Turn your right foot out 90 degrees, left foot slightly in
    • Extend arms wide at shoulder height
    • Hinge at the hip to reach your right hand toward your right shin or ankle
    • Left arm reaches up toward the ceiling
    • Look up toward your raised hand if comfortable
    • Hold, then switch sides

    Why it works: The lateral stretch activates and tones the obliques — creating the appearance of a slimmer waist even before significant fat loss occurs. Regular triangle pose practice visibly improves waist definition.

    14. Seated Spinal Twist (Ardha Matsyendrasana)

    Target area: Obliques, spine, digestive organs, and detoxification. Hold time: 30–45 seconds each side | Sets: 3 each side

    Twisting poses are among the most powerful tools in yoga to reduce belly fat for females at home because they directly massage the digestive organs, stimulate detoxification, and engage the oblique muscles.

    How to do it:

    • Sit with legs extended
    • Bend your right knee and cross it over your left leg, placing the right foot flat on the floor
    • Sit tall and twist your torso to the right
    • Hook your left elbow on the outside of your right knee
    • Right hand on the floor behind you for support
    • With each inhale, lengthen your spine; with each exhale, deepen the twist
    • Hold, then switch sides

    Why it works: The twisting action compresses the liver, kidneys, and intestines — stimulating detoxification and improving digestive function. The oblique engagement tones the side waist. This is one of the most therapeutically important poses in yoga to reduce belly fat for females at home.

    15. Legs Up the Wall (Viparita Karani)

    Target area: Stress reduction, circulation, digestive health, and hormonal balance. Hold time: 5–15 minutes | Sets: 1

    Yoga to Reduce Belly Fat for Females at Home

    The last, and possibly most underappreciated, yoga practice to help women lose belly fat at home is a moderate inversion. Significant stress and cortisol reduction are its main advantages.

    How to do it:

    • Next to a wall, take a sideways seat.
    • Lower your back to the floor while swinging your legs up the wall.
    • Your torso is horizontal, and your legs are vertical, forming an L-shape.
    • With your palms facing up, place your arms by your sides.
    • Shut your eyes and take a deep breath.
    • Hold for five to fifteen minutes.

    Why it functions. By deeply stimulating the parasympathetic nervous system, this potent restorative pose lowers cortisol to its lowest levels of the day. Over weeks of regular practice, 10 to 15 minutes of legs up the wall every day can yield noticeable results for women whose belly obesity is predominantly caused by persistent stress and high cortisol.

    Complete Daily Yoga Routine for Belly Fat Reduction

    Here’s a structured daily routine using the 15 poses above — designed as yoga to reduce belly fat for females at home in 30–45 minutes:

    OrderPoseDurationPurpose
    1Child’s Pose2 minWarm up, centering
    2Downward Facing Dog1 minFull body activation
    3Plank Pose3 x 30 secCore strength
    4Cobra Pose3 x 20 secBack strength, ab stretch
    5Boat Pose4 x 30 secDirect core work
    6Bridge Pose3 x 40 secGlutes, core, hormonal
    7Twisted Chair3 x 20 sec eachObliques, digestion
    8Triangle Pose3 x 30 sec eachSide waist, obliques
    9Warrior III3 x 20 sec eachCore, balance, calorie burn
    10Camel Pose3 x 25 secHip flexors, posture
    11Seated Spinal Twist3 x 40 sec eachDigestion, obliques, detox
    12Bow Pose3 x 20 secFull abdomen, digestion
    13Seated Forward Bend2 minDigestive compression, stress
    14Wind-Relieving Pose2 minBloating relief, lower abs
    15Legs Up the Wall10 minCortisol reduction, recovery

    Total time: Approximately 35–45 minutes

    Weekly Schedule for Yoga to Reduce Belly Fat for Females at Home

    DaySessionDuration
    MondayFull routine (all 15 poses)40 min
    TuesdayCore focus (Boat, Plank, Warrior III, Twisted Chair)25 min
    WednesdayFull routine + 15 min brisk walk55 min
    ThursdayDigestive focus (Twists, Forward Bend, Wind Relieving)30 min
    FridayFull routine40 min
    SaturdayPower Vinyasa flow (faster pace through all poses)45 min
    SundayRestorative (Child’s Pose, Seated Forward Bend, Legs Up Wall)25 min

    Tips to Maximize Results From Yoga to Reduce Belly Fat for Females at Home

    • Yoga works best for fat burning and digestion when done on an empty stomach, two to three hours after a meal, or first thing in the morning before breakfast.
    • In order to maximize the lowering of cortisol and activate the parasympathetic nervous system during yoga, take deep breaths into your abdomen.
    • Hold positions for a longer period of time. The more muscle fibers you recruit and the more calories you burn, the longer you hold a pose with optimal engagement.
    • A regular 30-minute yoga practice yields significantly greater benefits than sporadic 90-minute sessions; consistency is more important than perfection.
    • Combine with dietary modifications: Yoga for female belly fat reduction at home is most effective when combined with a diet reduced in processed foods, refined sugar, and alcohol.
    • Walking: On yoga days, 30 minutes of vigorous walking greatly boosts overall calorie burn without increasing recovery stress.
    • Make sleep a priority because inadequate sleep increases cortisol and negates the hormonal balancing effects of yoga.
    • Keep track of your waist measurement; instead of depending solely on the scale, measure it every two weeks. Yoga alters body composition in ways that the scale may not always indicate.

    How Long Until You See Results?

    Yoga to Reduce Belly Fat for Females at Home
    TimelineExpected Changes
    Week 1–2Reduced bloating, improved posture, better sleep, and less stress
    Week 3–4Noticeable improvement in core strength and flexibility, the waist may start to reduce
    Week 5–8Visible toning of the abdominal area, clothes fitting differently around the waist
    Week 8–12Significant reduction in belly fat visible, improved hormonal balance, better digestion
    3–6 monthsSubstantial transformation in the abdominal area with consistent practice + healthy diet

    Frequently Asked Questions 

    Can yoga actually reduce belly fat for females at home? 

    Yes — yoga to reduce belly fat for females at home works through multiple mechanisms, including cortisol reduction (which directly reduces belly fat storage), core muscle strengthening, calorie burning, improved digestion that reduces bloating, and hormonal balancing. Research confirms that regular yoga practice reduces waist circumference and abdominal fat, particularly in women. Results are best when yoga is combined with a healthy diet and adequate sleep.

    How long should I do yoga daily to reduce belly fat? 

    For meaningful belly fat reduction, practice yoga to reduce belly fat for females at home for at least 30–45 minutes daily, 5–6 days per week. Research suggests that consistent daily practice produces significantly better results than occasional longer sessions. Even 20 minutes of focused core and twist work daily produces measurable changes in waist circumference over 8–12 weeks.

    Which yoga poses are best for reducing belly fat in females? 

    The most effective poses for yoga to reduce belly fat for female at home are Boat Pose (strongest core activation), Plank Pose (full core engagement), Twisted Chair Pose (obliques and digestion), Seated Spinal Twist (digestive health and obliques), Triangle Pose (side waist toning), Bow Pose (full abdominal work), and Legs Up the Wall (cortisol reduction — the primary hormonal driver of belly fat in women).

    Is yoga better than exercise for belly fat in females?

     Yoga and traditional exercise work through different but complementary mechanisms. High-intensity exercise burns more calories per session. However, yoga uniquely addresses cortisol reduction — the hormonal root cause of belly fat that exercise alone often doesn’t resolve. Many women find that combining yoga to reduce belly fat for females at home with moderate cardio like walking produces better belly fat results than intense cardio alone, because the stress-reducing benefits of yoga lower the cortisol that drives abdominal fat storage.

    Can I lose belly fat with yoga in 1 month?

    Visible results from yoga to reduce belly fat for females at home typically begin appearing between weeks 4–8 of consistent daily practice. In the first month, most women notice significantly reduced bloating (which can dramatically flatten the belly), improved posture, better sleep, and the beginning of waist reduction. Significant fat loss takes 8–12 weeks of consistent practice combined with dietary improvements. Waist measurement is more reliable than scale weight for tracking yoga results.

    What time of day is best for yoga to reduce belly fat? 

    Morning practice — particularly on an empty stomach — is generally considered most effective for yoga to reduce belly fat for females at home. Morning yoga maximizes the cortisol-reducing benefits throughout the day, kickstarts metabolism, supports digestive function, and helps regulate appetite hormones. However, any consistent time that works with your schedule is far better than no practice. Evening yoga is particularly effective for restorative poses like Legs Up the Wall, which help reduce end-of-day cortisol.

    Do I need any equipment for yoga to reduce belly fat at home? 

    No equipment is required for yoga to reduce belly fat for female at home. A yoga mat is strongly recommended for grip, cushioning, and joint protection — a good quality mat costs $15–$40 and is a worthwhile investment. Optional but helpful: a yoga block for modifications in poses like Triangle, and a yoga strap for Seated Forward Bend if you have tight hamstrings. Everything else — space, motivation, and consistency — is free.

    Conclusion

    One of the most comprehensive, approachable, and successful methods for reducing abdominal fat for women at home is yoga. This is especially true for women whose belly fat is caused by stress, hormone imbalances, poor digestion, or age-related changes.

    Together, the 15 poses in this article will strengthen your core, lower cortisol, enhance digestion, balance hormones, burn calories, and alter your waistline without requiring you to leave your house, spend money at a gym, or engage in any high-impact, joint-damaging activity.

    Consistency is crucial. Yoga for women who want to lose belly fat at home has results that compound over time, with each session building on the previous one and each week getting you closer to your ideal waist. Years of infrequent exercise can never yield the same results as three months of consistent practice.

    Are you prepared to begin? Now roll out your mat. Start with Child’s Pose, take deep breaths, and perform the following pattern for even 20 minutes. That is the first and most crucial step you will take. Your body has the power to change in amazing ways. The way to help women lose belly fat at home is through yoga. The secret is to be consistent. Get started right now.

    For a detailed guide on effective yoga poses to reduce tummy fat, you can read this helpful article on Habuild.

  • How to Lose Belly Fat: 10 The Honest, Science-Backed Guide That Actually Works

    How to Lose Belly Fat: 10 The Honest, Science-Backed Guide That Actually Works

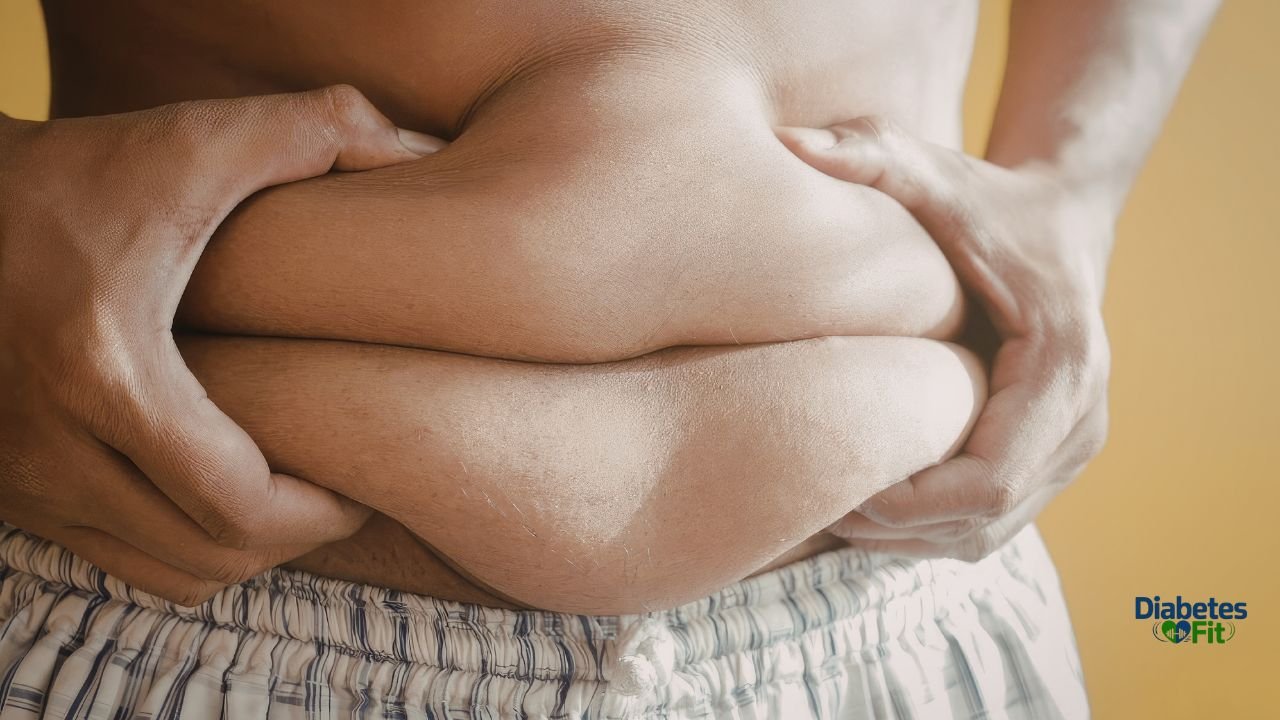
    You are not alone if you have been attempting to figure out how to reduce abdominal fat. One of the most prevalent and stubborn health and fitness issues in the world is belly obesity. If you are not looking at the wider picture, you can perform hundreds of crunches every day and yet not see benefits.

    The majority of individuals are unaware that decreasing abdominal fat involves more than just improving their appearance. Heart disease, type 2 diabetes, and metabolic syndrome are among the major health hazards that are directly associated with excess fat around your stomach, particularly the deep visceral fat that surrounds your organs.

    The good news is that appropriate lifestyle modifications can effectively reduce belly fat. This article will teach you how to lose belly fat using tried-and-true methods supported by actual science; there will not be any gimmicks, crash diets, or deceptive claims.

    Understanding Belly Fat: Two Types You Need to Know

    Knowing what type of fat you have is helpful before learning how to lose abdominal fat. There are different types of abdominal fat.

    1. Fat under the skin

    You may pinch this soft fat right beneath the skin. It is the fat that is most noticeable from the outside and rests atop your abdominal muscles. It can have an impact on looks, but compared to the second type, it presents a lower immediate health risk.

    2. Fat in the Viscera

    This type is hazardous. Deep within your abdomen, visceral fat encircles your intestines, pancreas, and liver. Although it is not visible or palpable, it is the fat most closely associated with:

    High blood pressure and heart disease

    Insulin resistance and type 2 diabetes

    Metabolic diseases and inflammation

    An increased risk of specific types of cancer

    Both types of fat are targeted by the tactics in this guide, but visceral fat is particularly well-responsive to dietary, activity, and lifestyle modifications.

    Why Belly Fat Is So Hard to Lose

    belly fat
    belly fat

    Many people have trouble losing belly fat because they do not understand why it accumulates in the first place,e or because they focus on the incorrect things.

    Typical causes of abdominal fat accumulation include:

    • High sugar and refined carb intake — spikes insulin, promoting fat storage in the abdomen
    • Chronic stress — raises cortisol levels, which directly causes belly fat to accumulate
    • Poor sleep disrupts hunger hormones and slows metabolism
    • Sedentary lifestyle — too much sitting with too little movement
    • Alcohol consumption is high in empty calories and promotes fat storage around the midsection
    • Hormonal changes — especially in women during menopause, when estrogen drops and fat shifts to the abdomen
    • Genetics — some people are more predisposed to storing fat in the belly

    Understanding these root causes is the first step in knowing how to lose belly fat effectively and permanently.

    How to Lose Belly Fat: 10 Proven Strategies

    1. Create a Calorie Deficit — But Don’t Starve Yourself

    The most basic rule of fat loss is that you need to burn more calories than you take in. We refer to this as a calorie deficit.

    The crucial point is that the deficit should be moderate rather than severe. Severe calorie restriction or crash dieting:

    • Slows your metabolism
    • Causes muscle loss (which slows fat burning further)
    • Increases cortisol (which promotes belly fat storage)
    • Is nearly impossible to sustain

    The sweet spot: A deficit of 300–500 calories per day leads to sustainable fat loss of 0.5–1 kg per week — without destroying your metabolism or muscle mass.

    2. Cut Sugar and Refined Carbohydrates

    Belly-Fat
    Belly-Fat

    This is the most significant dietary adjustment you can make if you want to learn how to quickly lose abdominal fat.

    The liver breaks down sugar, particularly fructose from added sugars and sugar-filled beverages. Your liver turns extra fructose into fat when you eat more than it can process. The abdomen is where this fat is mainly deposited.

    Foods to reduce or eliminate:

    • Sugary drinks — soda, fruit juice, energy drinks, sweetened coffee
    • White bread, white rice, and refined pasta
    • Candy, cookies, cakes, and pastries
    • Breakfast cereals with added sugar
    • Flavouredd yogurts and sweetened dairy products

    Replace them with:

    • Water, sparkling water, or unsweetened tea
    • Whole grains — oats, brown rice, quinoa
    • Vegetables and legumes
    • Plain yogurt with fresh fruit
    • Whole fruit instead of fruit juice

    According to a study that was published in the American Journal of Clinical Nutrition, even when total calorie consumption was identical, persons who cut back on added sugar lost a lot more belly fat than those who merely cut calories.

    3. Eat More Protein

    Protein is the most powerful macronutrient for losing belly fat. Here’s why:

    • It keeps you fuller for longer, reducing overall calorie intake
    • It has a high thermic effect — your body burns more calories digesting protein than carbs or fat
    • It preserves and builds lean muscle, which raises your resting metabolic rate
    • It helps regulate hunger hormones like ghrelin

    Best protein sources:

    • Eggs
    • Chicken, turkey, and lean meats
    • Fish and seafood
    • Greek yogurt and cottage cheese
    • Legumes and lentils
    • Tofu and tempeh

    Aim for 1.6–2.2 grams of protein per kilogram of body weight per day. One of the methods for reducing belly fat that has received the most consistent support from research is a high-protein diet.

    4. Add Soluble Fibre to Every Meal

    Fibre, particularly soluble fibre, is an effective way to reduce belly fat. In your stomach, soluble fibre creates a thick gel by absorbing water. This decreases hunger, slows digestion, and nourishes good gut flora.

    Belly fat decreased by 3.7% over five years with every 10g increase in daily soluble fibre consumption, even in the absence of other alterations, according to a seminal study published in Obesity.

    Best sources of soluble fibre:

    • Oats and oat bran
    • Flaxseeds and chia seeds
    • Beans, lentils, and chickpeas
    • Apples, pears, and citrus fruits
    • Carrots and sweet potatoes
    • Avocado

    5. Do Cardio Exercise Consistently

    Belly-Fat

    One of the best methods to reduce belly fat, especially the harmful visceral fat surrounding your organs, is aerobic activity, or cardio.

    Running marathons is not necessary. Over the course of eight to twelve weeks, research consistently demonstrates that moderate-intensity cardio performed four to five days a week results in significant reductions in belly fat.

    Effective cardio options:

    • Brisk walking (30–45 minutes daily)
    • Jogging or running
    • Cycling (outdoor or stationary)
    • Swimming
    • Jump rope
    • Dance or aerobics classes

    Aerobic exercise decreased visceral fat by up to 7% over the course of eight months without requiring dietary adjustments, according to a study published in the American Journal of Physiology.

    6. Add Strength Training to Your Routine

    When studying how to lose belly fat, many people just concentrate on cardio, ignoring the benefits of strength training.

    Your resting metabolic rate (RMR), or how many calories your body burns when at rest, increases when you gain muscle. Having more muscle means burning more calories all day long, even while you are asleep.

    Additionally, strength training increases insulin sensitivity, which directly lowers the storage of belly fat.

    Effective strength exercises:

    • Squats and lunges
    • Push-ups and rows
    • Deadlifts and hip hinges
    • Planks and core work
    • Resistance band exercises

    Aim for 2–3 strength training sessions per week alongside your cardio.

    7. Reduce Stress — It’s Directly Linked to Belly Fat

    Not enough attention is paid to this one. One of the main causes of abdominal fat gain is chronic stress.

    Stress causes your body to release cortisol, a hormone that tells your body to accumulate fat, especially in the abdomen. Appetite and cravings for comfort foods high in calories are also increased by high cortisol.

    Evidence-based stress reduction strategies:

    • Daily meditation or mindfulness (even 10 minutes helps)
    • Regular physical exercise (doubles as belly fat reduction)
    • Deep breathing exercises
    • Time in nature
    • Reducing overcommitment and setting healthy boundaries
    • Social connection and talking to people you trust

    No matter how clean your food is, you may find it difficult to lose belly fat if you are doing everything else correctly but not controlling your stress.

    8. Prioritize Sleep — It’s Not Optional

    One of the most underappreciated causes of abdominal obesity is inadequate sleep. People who slept less than five hours a night had much higher visceral fat than those who slept seven to eight hours, according to research published in SLEEP.

    What occurs when you do not get enough sleep is as follows:

    • Ghrelin (hunger hormone) increases — you feel hungrier
    • Leptin (fullness hormone) decreases — you feel less satisfied after eating
    • Cortisol rises — belly fat storage increases
    • Metabolism slows — you burn fewer calories at rest

    Tips for better sleep:

    • Go to bed and wake up at the same time every day
    • Keep your bedroom cool, dark, and quiet
    • Avoid screens for 1 hour before bed
    • Limit caffeine after 2 p.m.
    • Avoid large meals within 2 hours of bedtime..

    Getting 7–9 hours of quality sleep per night is not laziness — it’s one of the most important things you can do to lose belly fat.

    9. Cut Back on Alcohol

    The term “liquid belly fat” is frequently applied to alcohol, and with good reason. It has a lot of empty calories, interferes with fat metabolism, and causes the liver to digest alcohol instead of burning fat.

    Particularly problematic are sugary cocktails and beer. Regular alcohol use is strongly associated with extra belly fat, especially deep visceral fat, according to numerous studies.

    Although you do not have to give up completely, drastically reducing your intake can considerably lower your levels of belly fat in a matter of weeks.

    10. Be Patient and Stay Consistent

    The most crucial tactic is the one that most people overlook. Neither the accumulation nor the disappearance of belly fat happens overnight.

    According to research, it usually takes 8–12 weeks of constant effort to get significant reductions in belly fat. While some people experience effects more quickly, others take longer. It is important to be present every single week.

    Tracking progress tips:

    • Measure your waist circumference weekly (more accurate than scale weight for belly fat)
    • Take progress photos every 2–4 weeks
    • Track energy levels, sleep quality, and how your clothes fit
    • Don’t let one bad day derail a week of good choices

    Best Foods to Lose Belly Fat

    Belly-Fat
    Belly-Fat
    FoodWhy It Helps
    EggsHigh protein keeps you full, supports muscle
    AvocadoHealthy fats, fiber, reduces inflammation
    OatsSoluble fifibrestabilizes blood sugar
    Salmon and fatty fishOmega-3s reduce inflammation and visceral fat
    Greek yogurtProtein + probiotics support gut health
    BerriesAntioxidants, fibre, low in sugar
    Green teaCatechins boost metabolism and fat burning
    Low-calorie
    Beans and lentilsProtein + fibre combo reduces belly fat
    Nuts and seedsHealthy fats reduce hunger, anti-inflammatory

    Worst Foods for Belly Fat

    FoodWhy It’s Harmful
    Sugary drinksSpikes insulin, promotes visceral fat storage
    White bread and pastaRefined carbs cause blood sugar spikes
    AlcoholEmpty caloriesdisrupts fat metabolism
    Fried foodsHigh calorie, inflammatory, promotes fat storage
    Packaged snacksAdded sugars, refined carbs, trans fats
    Flavored yogurtOften as sugary as dessert
    Fruit juiceHigh sugar, lacks fiber of whole fruit
    Margarine and trans fatsDirectly linked to increased belly fat

    How Long Does It Take to Lose Belly Fat?

    Effort LevelExpected TimelineWeekly Loss
    Moderate (diet + light cardio)12–16 weeks for visible change0.3–0.5 kg/week
    Consistent (diet + cardio + strength)8–12 weeks for visible change0.5–1 kg/week
    Intensive (full lifestyle overhaul)6–8 weeks for visible change0.7–1.2 kg/week

    Individual results vary based on starting body fat, genetics, age, hormones, and consistency.

    Frequently Asked Questions 

    What is the fastest way to lose belly fat? 

    The fastest sustainable approach combines reducing sugar and refined carbs, eating more protein and fiber, doing daily cardio, adding strength training, improving sleep, and managing stress. There are no true shortcuts — but this combination produces results faster than any single strategy alone.

    Can I lose belly fat by walking every day? 

    Yes. Brisk walking for 30–45 minutes daily is one of the most effective and sustainable ways to reduce belly fat — especially visceral fat. It’s low impact, accessible to everyone, and research consistently shows it reduces abdominal fat over time when combined with a healthy diet.

    Does drinking water help lose belly fat?

     Yes, indirectly. Staying well hydrated supports metabolism, reduces water retention and bloating, helps control appetite, and supports liver function in processing and mobilizing fat. Replacing sugary drinks with water has a direct impact on calorie intake and belly fat reduction.

    Are crunches effective for losing belly fat? 

    Crunches strengthen and tone the abdominal muscles, but they do not directly burn belly fat. Spot reduction is a myth. To lose belly fat, you need to reduce overall body fat through diet, cardio, and strength training — then your toned abs will become visible as fat decreases.

     Does stress cause belly fat? 

     Yes. Chronic stress raises cortisol levels, which directly promote fat storage in the abdominal area. Managing stress through exercise, meditation, sleep, and lifestyle changes is an essential part of any effective plan for how to lose belly fat.

    Is belly fat dangerous to health?

     Yes — especially visceral fat (deep belly fat around organs). It is strongly linked to heart disease, type 2 diabetes, insulin resistance, inflammation, and certain cancers. Losing belly fat improves not just appearance but overall metabolic health and longevity.

    How do I know if I’m losing belly fat?

     The best way to track belly fat loss is to measure your waist circumference weekly with a tape measure (at the level of your belly button). A waist measurement under 94cm for men and under 80cm for women is generally considered a healthy target. Scale weight alone doesn’t always reflect belly fat changes accurately.

    Conclusion

    Finding the ideal diet or the secret workout is not the key to learning how to reduce abdominal fat. It is about doing the correct things regularly: eating less sugar, getting more protein and ffibre exercising every day, getting enough sleep, and controlling your stress.

    This guide’s tactics are all supported by science. They are not all excessive. When you work them regularly, they are all effective.

    The key to reducing belly fat is to generate a small calorie deficit, reduce sugar and refined carbohydrates, eat more healthy foods, exercise frequently, get adequate sleep, and be patient. You will see effects if you do these activities for eight to twelve weeks.

    The next step is easy for you. Choose two or three tactics from this manual and get going right now. Cut one sugar-filled beverage. Take a half-hour stroll. Tonight, go to bed thirty minutes early. Belly fat can be permanently eliminated by making little, regular modifications.

    For more science-backed information on belly fat and overall health, we recommend visiting Healthline’s guide on belly fat and the Harvard T.H. Chan School of Public Health for research-based nutrition and fitness advice. The American Heart Association also provides excellent resources on how excess belly fat affects your heart health and what you can do about it. These trusted sources can help you go deeper into the science behind everything covered in this article.

  • Fat Burning Exercises at Home: 12 Powerful Moves to Lose Weight Without a Gym

    Fat Burning Exercises at Home: 12 Powerful Moves to Lose Weight Without a Gym

    You don’t need an expensive gym membership or fancy equipment to lose weight. Fat-burning exercises at home are just as effective — sometimes even more so — than anything you’d do at a gym. All you need is some open floor space, your own body weight, and the right moves.

    The truth is, some of the most powerful calorie-burning workouts ever designed require zero equipment. From jumping jacks to burpees to mountain climbers, fat-burning exercises at home can torch serious calories, boost your metabolism, and help you build a leaner, stronger body — all without leaving your living room.

    In this article, you’ll find 12 of the best fat-burning exercises at home, a beginner-friendly workout plan, tips to maximize your results, and answers to the most common questions. Let’s get moving.

    Along with exercising, certain natural drinks may help support metabolism—check out our post Clove Water Benefits to learn more.

    Why Fat-Burning Exercises at Home Actually Work

    Understanding what makes a workout successful for fat loss is helpful before beginning the activities.

    Your body uses stored fat as fuel when it burns fat. This happens when:

    When you burn more calories than you take in, you generate a calorie deficit.

    You raise your heart rate to between 60 and 80 percent of your maximal heart rate, which is the fat-burning zone.

    When you gain muscle mass, your resting metabolic rate increases and you burn more calories even when you are not moving.

    Excess Post-Exercise Oxygen Consumption, or EPOC, is the afterburn effect that causes your body to continue burning calories for hours after a workout.

    Exercises at home, particularly high-intensity ones, successfully accomplish all of these goals. Bodyweight HIIT exercises can burn as many calories as moderate-intensity gym sessions, if not more, according to research published in the Journal of Strength and Conditioning Research.

    What Makes the Best Fat-Burning Exercises at Home?

    Fat Burning Exercises at Home

    Exercises vary in how quickly they burn fat. These characteristics are shared by the best at-home fat-burning exercises:

    • They work big, muscular areas, such as the back, legs, glutes, and core, which burn more calories than smaller muscles.
    • Cardio-style exercises maintain a high metabolism both during and after exercise since they rapidly increase heart rate.
    • They can be performed in intervals; the HIIT technique, which alternates between intense exertion and rest, maximizes fat burning.
    • They increase functional strength; exercises that replicate real-world motion enhance general fitness and body composition.

    Let us now begin the actual exercises.

    12 Best Fat-Burning Exercises at Home

    1. Jumping Jacks

    Calories burned: ~8–10 per minute

    A classic for good reason. Jumping jacks get your whole body moving, raise your heart rate fast, and are perfect as a warm-up or as part of a circuit.

    How to do it:

    • Stand with feet together and arms at your sides
    • Jump your feet out wide while raising your arms overhead
    • Jump back to the starting position
    • Repeat at a steady, fast pace

    Best for: Warm-up, active recovery between harder exercises

    2. Burpees

    Calories burned: ~10–15 per minute

    Burpees are one of the most effective fat-burning exercises at home — period. They work your chest, arms, core, legs, and cardiovascular system all at once.

    How to do it:

    • Stand tall, then drop your hands to the floor
    • Jump your feet back into a plank position
    • Do one push-up (optional but recommended)
    • Jump your feet back to your hands
    • Explode upward into a jump with arms overhead
    • Land softly and repeat

    Best for: Maximum calorie burn in minimum time

    3. High Knees

    Calories burned: ~8–12 per minute

    High knees mimic running in place but with exaggerated knee lifts that engage your core and hip flexors much more intensely.

    How to do it:

    • Stand with feet hip-width apart
    • Run in place, driving each knee up toward your chest
    • Pump your arms in rhythm with your legs
    • Keep your core tight and your back straight
    • Aim for a fast, controlled pace

    Best for: Cardio, core activation, warming up

    4. Mountain Climbers

    Calories burned: ~8–12 per minute

    Mountain climbers are a full-body fat burner that also builds serious core strength. They’re one of the top fat-burning exercises at home for people who want to strengthen their midsection while losing weight.

    How to do it:

    • Start in a high plank position — hands under shoulders, body in a straight line
    • Drive one knee toward your chest, then quickly switch legs
    • Keep alternating at a fast pace — like running horizontally
    • Keep your hips level and core engaged throughout

    Best for: Core strength, full-body cardio, HIIT circuits

    5. Squat Jumps

    Calories burned: ~8–12 per minute

    Squat jumps combine the muscle-building power of squats with the cardiovascular intensity of jumping. Your legs and glutes — the body’s largest muscles — work overtime, making this one of the highest-calorie-burning fat-burning exercises at home.

    How to do it:

    • Stand with feet shoulder-width apart
    • Lower into a squat position — thighs parallel to the floor
    • Explode upward into a jump, reaching your arms overhead
    • Land softly with bent knees and sink immediately into the next squat
    • Repeat continuously

    Best for: Leg toning, glute activation, explosive cardio

    6. Push-Ups

    Calories burned: ~7–10 per minute

    Push-ups aren’t just for building a strong chest. Done at a fast pace or in circuit format, push-ups are excellent fat-burning exercises at home that strengthen your upper body while keeping your heart rate up.

    How to do it:

    • Start in a high plank position
    • Lower your chest to the floor, keeping your elbows at about 45 degrees
    • Push back up to the starting position
    • Keep your core tight and your body in a straight line throughout

    Modifications: Do push-ups on your knees if you’re a beginner, or elevate your feet for a harder version.

    Best for: Upper body strength, chest, shoulders, triceps

    7. Plank

    Calories burned: ~3–5 per minute (but builds metabolism-boosting muscle)

    Fat Burning Exercises at Home

    Planks don’t burn as many calories in the moment as jumping exercises, but they build deep core muscle that raises your resting metabolic rate — making them an important part of any fat-burning home workout.

    How to do it:

    • Rest on your forearms and toes, body in a straight line
    • Keep your hips level — don’t let them sag or rise
    • Hold for 20–60 seconds, breathing steadily
    • Rest and repeat

    Best for: Core strength, posture, metabolic support

    8. Lunges

    Calories burned: ~6–8 per minute

    Lunges target the quads, hamstrings, and glutes — three of the body’s biggest muscle groups. More muscle engagement means more calories burned — during and after your workout.

    How to do it:

    • Stand with feet together
    • Step one foot forward and lower your back knee toward the floor
    • Both knees should form 90-degree angles at the bottom
    • Push back up and repeat on the other side
    • Add a jump between lunges for extra intensity (jumping lunges)

    Best for: Leg toning, glute development, functional strength

    9. Bicycle Crunches

    Calories burned: ~6–8 per minute

    Bicycle crunches are among the most effective abdominal exercises ever studied, according to research by the American Council on Exercise. They’re excellent fat-burning exercises at home for anyone targeting their midsection.

    How to do it:

    • Lie on your back with your hands behind your head
    • Lift your shoulders off the floor and bring one knee toward your chest
    • Twist to bring the opposite elbow toward that knee
    • Switch sides in a smooth, cycling motion
    • Keep your lower back pressed to the floor

    Best for: Abs, obliques, core definition

    10. Donkey Kicks

    Calories burned: ~5–7 per minute

    Donkey kicks isolate and tone the glutes — the body’s largest muscle group. Building glute strength supports fat loss and improves posture and athletic performance.

    How to do it:

    • Start on all fours — hands under shoulders, knees under hips
    • Keeping your knee bent at 90 degrees, kick one leg back and up toward the ceiling
    • Squeeze your glute at the top
    • Lower and repeat, then switch legs

    Best for: Glute toning, lower body shaping

    11. Skaters

    Calories burned: ~8–10 per minute

    Skaters are a lateral movement that improves agility, balance, and cardiovascular fitness. They’re fun, effective, and one of the most underrated fat-burning exercises at home.

    How to do it:

    • Leap to one side, landing on one foot with a slight bend in your knee
    • Swing your other leg behind you like a speed skater
    • Immediately leap to the other side
    • Keep moving side to side at a quick, controlled pace

    Best for: Lateral agility, cardio, glutes, and inner thighs

    12. Box Steps or Stair Climbing

    Calories burned: ~8–11 per minute

    Fat Burning Exercises at Home

    If you have stairs at home, use them. Stair climbing is one of the most effective and underused fat-burning exercises at home. No stairs? Use a sturdy step or low platform.

    How to do it:

    • Step up with one foot, then the other
    • Step down and repeat
    • Increase speed for more intensity
    • Add a knee raise at the top for extra core work

    Best for: Lower body strength, cardiovascular endurance, accessible for all fitness levels

    Calorie Burn Comparison: All 12 Exercises at a Glance

    ExerciseCalories Burned (per min)DifficultyEquipment Needed
    Jumping Jacks8–10BeginnerNone
    Burpees10–15AdvancedNone
    High Knees8–12Beginner–IntermediateNone
    Mountain Climbers8–12IntermediateNone
    Squat Jumps8–12IntermediateNone
    Push-Ups7–10Beginner–IntermediateNone
    Plank3–5BeginnerNone
    Lunges6–8BeginnerNone
    Bicycle Crunches6–8Beginner–IntermediateNone
    Donkey Kicks5–7BeginnerNone
    Skaters8–10IntermediateNone
    Stair Climbing8–11BeginnerStairs or step

    Beginner Home Workout Plan for Fat Loss

    If you’re just starting, here’s a simple weekly plan using fat-burning exercises at home:

    Week 1–2: Foundation (3 days per week)

    ExerciseSetsReps / Time
    Jumping Jacks330 seconds
    Push-Ups310 reps
    Lunges310 each leg
    Plank320 seconds
    High Knees330 seconds

    Rest 30–45 seconds between sets. Total time: ~20–25 minutes.

    Week 3–4: Step It Up (4 days per week)

    ExerciseSetsReps / Time
    Burpees310 reps
    Mountain Climbers330 seconds
    Squat Jumps312 reps
    Bicycle Crunches320 reps
    Skaters330 seconds
    Plank340 seconds

    Rest 20–30 seconds between sets. Total time: ~25–30 minutes.

    Week 5 and Beyond: HIIT Format (4–5 days per week)

    Work for 40 seconds, rest for 20 seconds. Cycle through all 12 exercises twice. This is a full HIIT circuit — one of the most powerful fat-burning workouts you can do at home. Total time: ~30–35 minutes.

    Tips to Maximize Fat Burning at Home

    • Maintain consistency: four or five workouts a week are preferable to one long session followed by a week off.
    • Exercise cannot outperform a poor diet; nutrition is responsible for 70–80% of weight reduction outcomes.
    • To maintain pushing your body, add progressive overload by increasing reps, speed, or sets every one to two weeks.
    • Get enough sleep because insufficient sleep depletes drive and increases cortisol, a hormone that stores fat.
    • Drink enough water to maintain a healthy metabolism and perform well during exercise.
    • Warm up and cool down: Five minutes of gentle exercise both before and after can help heal and prevent injuries.
    • Monitor your development using pictures, measurements, or a fitness journal to keep yourself inspired.

    Frequently Asked Questions 

    Can fat-burning exercises at home really help me lose weight? 

    Absolutely. Fat-burning exercises at home can be just as effective as gym workouts. Bodyweight HIIT workouts burn significant calories, build muscle, and boost metabolism — all of which drive weight loss. The key is consistency and pairing exercise with a healthy diet.

    How long should I exercise at home to burn fat?

    For fat loss, aim for 20–40 minutes of moderate-to-high intensity exercise, 4–5 days per week. Even 20-minute HIIT sessions done consistently produce excellent results. Longer workouts aren’t always better — intensity and regularity matter more.

    What is the single best fat-burning exercise at home? 

    Burpees are widely considered the most effective single fat-burning exercise because they work every major muscle group and spike heart rate rapidly. However, combining multiple exercises in a circuit gives far better overall results than any single move.

    Do I need any equipment for fat-burning workouts at home?

    No. All 12 exercises in this article require zero equipment. A yoga mat for comfort is helpful but not essential. As you get stronger, you can add resistance bands or dumbbells — but bodyweight alone is more than enough to burn serious fat.

    How many calories can I burn doing fat-burning exercises at home? 

    A 30-minute HIIT workout at home can burn between 200 and 400 calories, depending on your weight, intensity, and fitness level. Over time, as you build muscle, your resting metabolic rate increases — meaning you burn more calories even at rest.

    How soon will I see results from working out at home? 

    Most people notice improved energy and reduced bloating within 1–2 weeks. Visible changes in body composition typically appear after 4–6 weeks of consistent training and healthy eating. Significant fat loss results are usually clear after 8–12 weeks.

    Is HIIT better than regular cardio for fat loss at home? 

    For time efficiency, yes. HIIT burns more calories in less time and creates a stronger afterburn effect (EPOC) than steady-state cardio. However, both have benefits. A combination of HIIT sessions and lower-intensity movement (like walking or yoga) is ideal for sustainable fat loss.

    Conclusion

    It is not required to use the gym. The outcomes are not. With no equipment and no monthly costs, these 12 at-home fat-burning workouts provide you with all you need to alter your body, gain power, and reduce weight.

    Exercises that burn fat at home are effective when done at home. The exercises are tried-and-true, the strategy is straightforward, and consistency is the only thing preventing you from seeing results.

    Start with the plan for beginners. Learn the fundamentals. Next, progress to the complete HIIT circuit. Your body will transform every week, and your confidence will follow suit.

    Are you prepared to begin? Make some room on the floor, save this page to your bookmarks, and work out for the first time today. It only takes 20 minutes to get started. Put on your shoes, come on over, and let us go because the finest at-home workouts are the ones you actually perform.

    For more expert examples of effective fat‑burning workouts you can do both at home and at the gym, check out this helpful guide on Everyday Health.

  • Does Exercise Increase Blood Sugar? Everything You Need to Know

    Does Exercise Increase Blood Sugar? Everything You Need to Know

    If you have diabetes or you are simply trying to keep your blood sugar levels healthy, you have probably asked this question at some point: Does exercise increase blood sugar? It is a great question, and honestly, the answer is a little more interesting than just a simple yes or no. 

    Exercise affects your blood sugar in different ways depending on the type of workout you do, how long you exercise, and even what you eat before hitting the gym.

    In this article, we are going to break it all down in simple, easy-to-understand language. No complicated medical terms, no confusing charts — just clear, honest information that can actually help you make better decisions about your health and fitness.

    To better manage blood sugar, learn how to choose the right bread here: Best Bread for Diabetics.

    First, Let’s Understand How Blood Sugar Works

    Before we talk about exercise, it helps to understand what blood sugar actually is and why it matters. Blood sugar, also called blood glucose, is the main source of energy for your body. When you eat food — especially carbohydrates — your digestive system breaks it down into glucose. That glucose then enters your bloodstream and travels to your cells to give them energy.

    Your pancreas produces a hormone called insulin that helps move glucose from your blood into your cells. When this system works well, your blood sugar stays in a healthy range. But when it does not work properly — as in the case of type 1 or type 2 diabetes — blood sugar can rise too high or drop too low, causing serious health problems.

    Now, where does exercise fit into all of this? That is where things get really interesting.

    So, Does Exercise Increase Blood Sugar?

    The short answer is — it depends. Exercise can both raise and lower blood sugar levels, and it all comes down to what kind of exercise you are doing.

    Let us look at both sides of this.

    How Exercise Can Lower Blood Sugar

    For most people, especially those with type 2 diabetes, regular exercise is one of the best natural ways to lower blood sugar. Here is why.

    Does Exercise Increase Blood Sugar?

    When you exercise, your muscles need energy. To get that energy, they start using up glucose, which means they pull sugar out of your bloodstream. This process happens even without insulin, which is great news for people whose insulin is not working as well as it should.

    During moderate-intensity exercise like brisk walking, swimming, or cycling, your muscles absorb glucose at a much higher rate than when you are sitting still. This causes your blood sugar levels to drop during and after the workout. In fact, the effects of exercise on blood sugar can last for up to 24 hours after you finish working out. That is why regular exercise is so powerful for managing diabetes and overall health.

    Regular exercise also makes your body more sensitive to insulin over time. This means your cells respond better to insulin and absorb glucose more efficiently. Better insulin sensitivity means lower blood sugar levels overall — even on days when you do not work out.

    How Exercise Can Raise Blood Sugar

    Now here is the part that surprises many people — yes, certain types of exercise can actually raise your blood sugar, at least temporarily.

    This usually happens with high-intensity exercise like sprinting, heavy weightlifting, or intense interval training. When you push your body really hard, it sees it as a form of stress. In response to that stress, your body releases hormones like adrenaline and cortisol. These stress hormones signal your liver to release stored glucose into your bloodstream to give you a quick burst of energy.

    The result? Your blood sugar can spike during or right after intense exercise — even if you did not eat anything beforehand.

    This does not mean high-intensity exercise is bad for you. It just means you need to be aware of it, especially if you have diabetes. In most cases, the blood sugar rise from intense exercise is temporary. Once your body calms down and starts recovering, your blood sugar usually comes back down — and often drops lower than it was before you started working out.

    The Dawn Phenomenon and Morning Workouts

    Does Exercise Increase Blood Sugar?

    Another reason some people notice higher blood sugar during exercise — especially morning workouts — is something called the dawn phenomenon. In the early morning hours, your body naturally releases hormones like cortisol and growth hormone to help you wake up and get going. These hormones can cause your blood sugar to rise even before you eat anything.

    If you exercise in the morning, this natural rise in hormones, combined with the stress response from exercise, can push your blood sugar up temporarily. Again, this is not dangerous for most healthy people, but it is something to watch if you are managing diabetes.

    Different Types of Exercise and Their Effect on Blood Sugar

    Understanding how different workouts affect your blood sugar can help you plan smarter. Here is a simple breakdown.

    Aerobic Exercise (Low to Moderate Intensity) This includes walking, jogging, cycling, dancing, and swimming. These activities generally lower blood sugar during and after exercise. They are great for people with diabetes and for anyone wanting to improve their overall blood sugar control. The longer you do aerobic exercise, the more glucose your muscles burn.

    Anaerobic Exercise (High Intensity) This includes sprinting, heavy lifting, HIIT workouts, and competitive sports. These activities can cause a temporary spike in blood sugar because of the stress hormones your body releases. However, after the workout, your blood sugar often drops as your muscles work to recover and refuel.

    Resistance Training (Weightlifting) Strength training has a mixed effect on blood sugar. During the workout, blood sugar might rise slightly. But over time, building muscle is incredibly beneficial for blood sugar control because muscle tissue uses more glucose than fat tissue — even at rest.

    Yoga and stretching:g These gentle forms of exercise typically have a mild lowering effect on blood sugar. They also reduce stress hormones, which indirectly helps keep blood sugar more stable.

    Tips for Managing Blood Sugar During Exercise

    Whether you have diabetes or just want to keep your blood sugar balanced, these practical tips can help you exercise safely and effectively.

    Does Exercise Increase Blood Sugar?

    Check Your Blood Sugar Before and After. er If you have diabetes, always check your blood sugar before you start exercising. If it is too low (below 100 mg/dL), have a small snack first. If it is very high (above 250 mg/dL), it might be better to wait and bring it down before working out. After exercise, check again to see how your body responded.

    Stay Hydrated Dehydration can cause blood sugar to rise. Drink plenty of water before, during, and after your workout. Avoid sugary sports drinks unless your blood sugar is actually low and you need a quick boost.

    Eat the Right Snack Before Exercise. A small snack with a mix of carbohydrates and protein about 30 minutes before exercise can help keep your blood sugar stable during the workout. Thinkof a banana with peanut butter or a small handful of nuts with a piece of fruit.

    Do Not Skip Meals. Exercising on an empty stomach can cause blood sugar to drop too low, especially if you are on diabetes medication. Eating a balanced meal a couple of hours before exercise gives your body the fuel it needs.

    Cool Down Properly. A proper cool-down after intense exercise helps your body transition more smoothly and can prevent sudden blood sugar drops. Spend five to ten minutes doing light walking or stretching after every workout.

    Talk to Your Doctor.r If you have diabetes, always work with your healthcare provider to understand how your body responds to different types of exercise. They can help you adjust your medication or meal plan around your workouts.

    Exercise Is Still One of the Best Things You Can Do

    Even though exercise can sometimes cause temporary blood sugar spikes, the long-term benefits are absolutely worth it. Regular physical activity helps you maintain a healthy weight, reduces belly fat (which is directly linked to insulin resistance), lowers blood pressure, improves cholesterol, and boosts your overall mood and energy.

    For people with type 2 diabetes, exercise is often considered one of the most powerful tools available — sometimes even more effective than medication for improving blood sugar control over time. And for people without diabetes, staying active is one of the best ways to prevent blood sugar problems from developing in the first place.

    The key is to find a type of exercise you enjoy, stay consistent, and pay attention to how your body responds. Everyone is different, and your blood sugar may react differently to exercise than someone else’s. That is completely normal.

    Conclusion

    So, does exercise increase blood sugar? The answer is — sometimes, temporarily, yes. High-intensity exercise can cause a short-term spike in blood sugar due to stress hormones. But in the bigger picture, regular exercise is one of the most effective and natural ways to lower blood sugar, improve insulin sensitivity, and protect your long-term health.

    The type of exercise you do matters, your timing matters, and what you eat around your workouts matters. But most importantly, staying active matters. Do not let the fear of a temporary blood sugar change stop you from enjoying the incredible benefits that exercise brings to your body and mind.

    Start slow, stay consistent, listen to your body — and always work with your doctor if you have any concerns about managing your blood sugar during exercise. You are making a smart choice by learning about this, and that is already a great first step.

    Frequently Asked Questions 

    Can exercise cause blood sugar to spike? 

    Yes, high-intensity exercise like sprinting or heavy weightlifting can cause a temporary blood sugar spike. This happens because your body releases stress hormones that tell the liver to release stored glucose. The spike is usually short-lived, and blood sugar often drops back down after recovery.

    What type of exercise is best for lowering blood sugar? 

    Moderate-intensity aerobic exercise, like brisk walking, cycling, or swimming, is generally the best for lowering blood sugar. These activities help your muscles absorb glucose directly from your bloodstream without needing a big insulin response.

    How long does exercise affect blood sugar? 

    Exercise can affect your blood sugar for up to 24 hours after your workout. This is why staying active consistently — even just going for a daily walk — can have a powerful impact on your overall blood sugar control.

    Should I exercise if my blood sugar is high? 

    If your blood sugar is mildly elevated, light to moderate exercise can actually help bring it down. However, if it is very high — above 250 mg/dL — you should check for ketones and consult your doctor before exercising, as intense activity in that state can make things worse.

    Can exercise lower blood sugar too much? 

    Yes, this is called hypoglycemia, or low blood sugar. It is more common in people with type 1 diabetes or those taking certain diabetes medications. To prevent this, eat a small snack before exercise and monitor your blood sugar before and after workouts.

    Is it safe for diabetics to exercise every day? 

    For most people with diabetes, daily exercise is not only safe but highly recommended. Even 30 minutes of light activity each day can make a big difference in blood sugar control. Always talk to your healthcare provider to create an exercise plan that is right for your specific situation.

  • If You Exercise Regularly, Your Resistance to Insulin Will Improve: The Complete Science-Backed Guide

    If You Exercise Regularly, Your Resistance to Insulin Will Improve: The Complete Science-Backed Guide

    If you exercise regularly, your resistance to insulin will improve dramatically, and this simple truth could transform your health. Whether you’re dealing with prediabetes, type 2 diabetes, or simply want to prevent these conditions, understanding how exercise affects insulin resistance is crucial for your well-being.

    Insulin resistance is a growing health concern affecting millions of people worldwide. It occurs when your cells don’t respond properly to insulin, forcing your pancreas to produce more and more of this hormone just to keep your blood sugar levels normal. Over time, this can lead to type 2 diabetes, heart disease, fatty liver, and other serious health problems.

    The good news? If you exercise regularly, your resistance to insulin will improve significantly, and you don’t need to become a marathon runner to see results. In this comprehensive guide, we’ll explore exactly how exercise reduces insulin resistance, what types of exercise work best, and how you can start seeing improvements in as little as a few weeks.

    Understanding Insulin Resistance and Why It Matters

    Before we dive into how exercise helps, let’s understand what insulin resistance actually means for your body.

    Insulin is a hormone your pancreas produces to help glucose (sugar) move from your bloodstream into your cells, where it’s used for energy. Think of insulin as a key that unlocks your cell doors to let glucose in.

    Want to know why pizza spikes blood sugar? Read: 5 Reasons Pizza Causes Glucose Spikes.

    When you have insulin resistance, these cell doors become harder to unlock. Your cells ignore insulin’s signals, so glucose stays in your bloodstream instead of entering cells. Your pancreas responds by making more insulin, trying to force those stubborn doors open.

    For a while, this extra insulin keeps your blood sugar normal. But eventually, your pancreas can’t keep up with the demand. Blood sugar levels start rising, leading to prediabetes and eventually type 2 diabetes if left unchecked.

    Insulin resistance doesn’t just affect blood sugar. High insulin levels promote fat storage, especially around your belly. They increase inflammation throughout your body, raise blood pressure, and contribute to fatty liver disease. This cluster of problems is called metabolic syndrome, and it significantly increases your risk of heart disease and stroke.

    The causes of insulin resistance are complex, but excess body weight, physical inactivity, poor diet, chronic stress, and lack of sleep all play major roles. Genetics also matters, with some people being more susceptible than others.

    How Exercise Improves Insulin Sensitivity at the Cellular Level

    Now here’s where the magic happens. If you exercise regularly, your resistance to insulin will improve through multiple powerful mechanisms working in your body.

    When you exercise, your muscles contract and need energy immediately. These working muscles can pull glucose from your bloodstream without needing much insulin at all. This happens through a completely separate pathway from the insulin-dependent one. During exercise, proteins called GLUT4 transporters move to the muscle cell surface and allow glucose to enter, bypassing the insulin resistance problem.

    This effect lasts well beyond your workout. For 24 to 48 hours after exercising, your muscles remain more sensitive to insulin. They’ve used up their stored glucose (glycogen) and are eager to refill those stores, so they respond better to insulin’s signals.
    Regular exercise also causes your muscles to build more GLUT4 transporters. The more you exercise, the more of these glucose transporters you have, making it easier for glucose to enter your cells even when you’re at rest.

    Exercise reduces the fat stored inside your muscle cells. This intramuscular fat interferes with insulin signaling, so removing it directly improves how well insulin works. You don’t even need to lose a lot of total body weight to see this benefit. Studies show that exercise improves insulin sensitivity even in people who don’t lose weight, though losing excess weight provides additional benefits.

    Physical activity also reduces inflammation in your body. Chronic inflammation interferes with insulin signaling pathways. When you exercise regularly, your body produces anti-inflammatory compounds that help insulin work more effectively.

    Perhaps most importantly, if you exercise regularly, your insulin resistance will improve because exercise helps you lose visceral fat, the dangerous fat stored deep in your abdomen around your organs. This type of fat is particularly harmful for insulin sensitivity because it releases inflammatory chemicals and free fatty acids that directly cause insulin resistance.

    The Best Types of Exercise for Reducing Insulin Resistance

    Not all exercise is created equal when it comes to improving insulin sensitivity. Let’s look at what works best.

    If You Exercise Regularly, Your Resistance to Insulin Will Improve

    Aerobic Exercise

    Aerobic or cardio exercise includes activities like walking, jogging, cycling, swimming, and dancing. These activities get your heart pumping and your muscles moving continuously.

    Research consistently shows that aerobic exercise significantly improves insulin sensitivity. Even a single session of moderate aerobic exercise can increase insulin sensitivity for 24 to 72 hours afterward. When you do it regularly, these benefits compound.

    For maximum benefit, aim for moderate-intensity aerobic exercise where you can still talk but not sing. This might be brisk walking, leisurely cycling, or water aerobics. Studies show that 150 minutes per week of moderate aerobic exercise substantially improves insulin sensitivity.

    If you prefer more vigorous exercise, you need less time. Just 75 minutes per week of vigorous activity like running, fast cycling, or swimming laps provides similar benefits. The key is consistency and making it part of your routine.

    Resistance Training

    Strength training or resistance exercise involves working your muscles against resistance, whether that’s weights, resistance bands, or your own body weight. This type of exercise builds muscle mass, and muscle is one of the most important tissues for glucose disposal.

    The more muscle mass you have, the more places glucose has to go when it leaves your bloodstream. Bigger, stronger muscles act like larger glucose storage facilities, improving your overall insulin sensitivity.

    Studies show that resistance training improves insulin sensitivity comparably to aerobic exercise. In some studies, strength training even outperforms cardio for reducing insulin resistance, particularly in older adults and people with type 2 diabetes.

    You don’t need fancy gym equipment. Bodyweight exercises like push-ups, squats, lunges, and planks work excellently. If you use weights, start light and focus on proper form. Aim for resistance training at least two to three times per week, working all major muscle groups.

    High-Intensity Interval Training (HIIT)

    HIIT involves short bursts of very intense exercise followed by recovery periods. For example, you might sprint for 30 seconds, then walk for 90 seconds, repeating this cycle several times.

    Research shows that HIIT is remarkably effective for improving insulin sensitivity, sometimes even more so than longer, moderate-intensity workouts. If you exercise regularly using HIIT, your resistance to insulin will improve significantly, often with less total exercise time than traditional cardio.

    HIIT appears to be particularly effective at reducing visceral fat and improving the way your muscles use glucose. However, it’s also more demanding and not suitable for everyone. If you’re new to exercise or have health conditions, start with moderate-intensity activities and work up to HIIT gradually.

    The Winning Combination

    The research suggests that combining aerobic exercise and resistance training provides the greatest improvements in insulin sensitivity. This combination addresses insulin resistance through multiple pathways: improving cardiovascular fitness, building muscle mass, reducing fat, and enhancing cellular glucose uptake mechanisms.

    A good weekly routine might include three days of aerobic exercise (like walking or cycling) and two to three days of strength training. You can do them on the same day or separate days, depending on your schedule and preferences.

    How Quickly Can You See Improvements?

    One of the most encouraging aspects of exercise and insulin sensitivity is how quickly you can see results.

    A single bout of exercise improves insulin sensitivity for 24 to 72 hours afterward. This means even before you see changes in your weight or fitness level, your body is already responding better to insulin.

    Within just one to two weeks of regular exercise, most people experience measurable improvements in insulin sensitivity. Studies using glucose clamp tests (the gold standard for measuring insulin sensitivity) show significant improvements after as little as seven days of training.

    After two to three months of regular exercise, improvements become even more pronounced. You’ll likely notice changes in how you feel, your energy levels, and, if you’re monitoring, your blood sugar readings. Your doctor might see improvements in fasting glucose, HbA1c (a measure of average blood sugar over three months), and fasting insulin levels.

    The improvements continue to build over time. People who maintain regular exercise for six months to a year often see dramatic changes in their metabolic health, sometimes even reversing prediabetes or significantly improving type 2 diabetes control.

    However, these benefits are not permanent without continued exercise. If you stop exercising, insulin sensitivity begins declining within just a few days. This is why consistency matters more than intensity. If you exercise regularly, your resistance to insulin will improve and stay improved, but you need to maintain that regular activity.

    Practical Tips for Getting Started and Staying Consistent

    If You Exercise Regularly, Your Resistance to Insulin Will Improve

    Knowing that exercise helps is one thing. Actually doing it consistently is another. Here are practical strategies to help you succeed.

    Start Where You Are

    If you’re currently inactive, don’t try to jump into intense workouts. Start with just 10 to 15 minutes of walking after meals. This simple habit has been shown in studies to significantly improve blood sugar control. As this becomes comfortable, gradually increase duration and intensity.

    Find Activities You Enjoy

    The best exercise is the one you’ll actually do. If you hate running, don’t force yourself to run. Try dancing, swimming, hiking, cycling, or group fitness classes. When you enjoy the activity, it feels less like a chore and more like something you look forward to.

    Schedule It Like an Appointment

    Treat exercise like any other important appointment. Put it in your calendar and protect that time. Many people find that exercising at the same time each day helps it become a habit.

    Move After Meals

    Blood sugar spikes highest after eating, so this is an ideal time to exercise. Even a 10 to 15-minute walk after meals can significantly reduce post-meal blood sugar spikes and improve insulin sensitivity. This is one of the most effective strategies for people with diabetes or prediabetes.

    Track Your Progress

    Keep a simple log of your exercise sessions. Seeing your consistency build over weeks and months provides motivation. If you have diabetes, track how exercise affects your blood sugar readings. Most people see immediate improvements, which reinforces the habit.

    Get Support

    Exercise with a friend, join a class, or participate in online fitness communities. Social support dramatically increases the likelihood that you’ll stick with your exercise program long-term.

    Be Flexible

    Life happens. Some weeks you’ll exercise exactly as planned, and others you won’t. The key is getting back on track without guilt or self-criticism. Missing a few days doesn’t undo your progress. Just start again with your next scheduled session.

    Additional Benefits Beyond Insulin Sensitivity

    While improved insulin sensitivity is a major benefit, if you exercise regularly, you’ll experience numerous other health improvements.

    Exercise helps with weight management by burning calories and preserving muscle mass during weight loss. It reduces blood pressure and improves cholesterol levels, lowering your risk of heart disease. Regular physical activity strengthens your bones, reducing osteoporosis risk.

    Mental health benefits are substantial. Exercise reduces symptoms of depression and anxiety, improves sleep quality, and enhances cognitive function. It boosts energy levels and improves your overall quality of life.

    For people with type 2 diabetes, regular exercise can reduce the need for medication. Some people can manage their diabetes with lifestyle changes alone, though this should always be done under medical supervision.

    Special Considerations and Safety

    Before starting a new exercise program, especially if you have diabetes, prediabetes, or other health conditions, consult your healthcare provider.

    If You Exercise Regularly, Your Resistance to Insulin Will Improve

    If you take insulin or medications that can cause low blood sugar, you’ll need to monitor your glucose levels before, during, and after exercise. You might need to adjust medication doses or have a snack to prevent hypoglycemia during or after workouts.

    Start slowly and progress gradually. Pushing too hard, too fast, increases injury risk and can make you so sore that you quit. Consistency over time matters much more than intensity on any single day.

    Stay hydrated, wear appropriate footwear, and pay attention to your body. Some muscle soreness is normal when starting exercise, but sharp pain, dizziness, chest pain, or severe shortness of breath requires immediate medical attention.

    If you have complications from diabetes, like neuropathy or retinopathy, certain exercises might not be safe. Your doctor can guide you on appropriate activities for your situation.

    Conclusion

    The evidence is clear and compelling: if you exercise regularly, your resistance to insulin will improve significantly. This isn’t just a minor benefit; it’s a powerful intervention that can prevent or even reverse insulin resistance, prediabetes, and in many cases, improve type 2 diabetes control.

    You don’t need to become an athlete or spend hours in the gym every day. Even moderate amounts of regular physical activity, as little as 30 minutes most days of the week, can produce remarkable improvements in insulin sensitivity. The benefits begin immediately and build over time with consistency.

    Exercise works through multiple mechanisms to combat insulin resistance: it allows muscles to use glucose without insulin, builds muscle mass that serves as glucose storage, reduces harmful visceral fat, decreases inflammation, and improves cellular signaling pathways. The combination of aerobic exercise and resistance training appears to provide the greatest benefits.

    The choice is yours, and the power is in your hands. By making physical activity a regular part of your life, you’re taking one of the most effective steps possible to improve your metabolic health, prevent chronic disease, and enhance your overall quality of life. Start today, stay consistent, and watch as if you exercise regularly, your insulin resistance will improve along with virtually every other aspect of your health.

    FAQs

     How much exercise do I need to see improvements in insulin resistance?

    You can see improvements with just 30 minutes of moderate exercise most days of the week (150 minutes total weekly). Even 10 to 15-minute walks after meals make a significant difference. A single workout improves insulin sensitivity for 24 to 72 hours. Consistency matters more than intensity, so start small and build gradually.

    Can exercise reverse insulin resistance completely, or do I still need medication?

    Exercise can dramatically improve or even reverse insulin resistance, especially when combined with healthy eating. Many people with prediabetes reverse their condition through lifestyle changes alone. Some with type 2 diabetes reduce or eliminate medication, but this varies by individual. Never adjust medication without consulting your doctor. Always work with your healthcare team to monitor progress.

    What’s better for insulin resistance: working out in the morning or after meals?

    Both help, but in different ways. Morning exercise improves insulin sensitivity throughout the day. Post-meal walks (10 to 15 minutes) effectively lower blood sugar spikes. Ideally, do structured exercise whenever it fits your schedule and add short walks after meals, especially dinner. Consistency matters more than timing, so choose when you’ll actually stick with it.

    I have bad knees and can’t do high-impact exercise. Can I still improve insulin resistance?

    Absolutely! Low-impact activities like swimming, water aerobics, cycling, walking, chair exercises, yoga, and resistance training with light weights are all highly effective for improving insulin resistance. You don’t need high-impact exercise to see results. Find comfortable activities you can do consistently, and consider working with a physical therapist for personalized exercise recommendations.

  • 60-Second Exercise to Lower Blood Sugar Naturally: A Complete Guide

    60-Second Exercise to Lower Blood Sugar Naturally: A Complete Guide

    Managing blood sugar levels doesn’t have to mean spending hours at the gym or following complicated workout routines. A simple 60 second exercise to lower blood sugar can be performed anywhere, anytime, and may be one of the most effective natural strategies for controlling glucose levels. This revolutionary approach to diabetes management is changing how people think about exercise and metabolic health.

    In this comprehensive guide, we’ll explore how a 60 second exercise to lower blood sugar works, which exercises are most effective, and how you can incorporate them into your daily routine for maximum benefits.

    Understanding Blood Sugar and Exercise

    60-Second Exercise to Lower Blood Sugar

    Before diving into the 60-second solution, it’s important to understand how blood sugar works in your body. When you eat, your body breaks down carbohydrates into glucose, which enters your bloodstream. Your pancreas then releases insulin to help cells absorb this glucose for energy.

    However, when blood sugar levels remain consistently high, it can lead to insulin resistance, type 2 diabetes, and various health complications. Exercise acts as a natural blood sugar regulator by helping muscles absorb glucose without requiring as much insulin.

    The 60-Second Blood Sugar-Lowering Exercises

    Here are several effective 60-second exercises you can perform anywhere, anytime:

    Chair Squats

    60-Second Exercise to Lower Blood Sugar

    This simple movement engages your quadriceps, hamstrings, and glutes – some of the largest muscle groups in your body. Stand in front of a chair with feet shoulder-width apart. Lower yourself as if sitting down, barely touching the chair, then stand back up. Repeat this movement continuously for 60 seconds. The constant engagement of these major muscles creates significant glucose demand.

    Wall Push-Ups

    60-Second Exercise to Lower Blood Sugar

    Perfect for people of all fitness levels, wall push-ups activate your chest, shoulders, and arms. Stand arm’s length from a wall, place your palms flat against it at shoulder height, and perform push-ups by bending and straightening your elbows. The repetitive muscle contraction helps shuttle glucose out of your bloodstream and into working muscles.

    High Knees in Place

    60-Second Exercise to Lower Blood Sugar

    This cardiovascular exercise gets your heart pumping while engaging your core and leg muscles. March in place while lifting your knees as high as comfortable, alternating quickly between legs. The increased heart rate combined with muscle activation creates a powerful blood sugar-lowering effect.

    Calf Raises

    60-Second Exercise to Lower Blood Sugar

    Stand with feet hip-width apart and slowly rise onto your toes, then lower back down. This targets your calf muscles and can be done while waiting for coffee to brew, standing in line, or during any brief pause in your day. The simplicity makes it easy to repeat multiple times throughout the day.

    Desk or Counter Push-Offs

    60-Second Exercise to Lower Blood Sugar

    Place your hands on a desk or kitchen counter, step back so your body forms an angle, and perform push-ups against the elevated surface. This variation is easier than floor push-ups but still effectively engages multiple muscle groups to absorb blood glucose.

    When to Perform These Exercises

    Timing matters when using exercise to manage blood sugar. The most effective times to perform your 60-second exercises are:

    After Meals: Blood sugar typically peaks 30 to 90 minutes after eating. Performing a quick exercise session during this window can blunt the glucose spike significantly. Many people find that a 60-second exercise routine immediately after finishing a meal becomes a helpful habit.

    Mid-Morning and Mid-Afternoon: These times often coincide with energy dips and potential blood sugar fluctuations. A quick exercise burst can stabilize levels and provide an energy boost without reaching for sugary snacks.

    Before Bed: A brief exercise session before sleep can help prevent the dawn phenomenon, where blood sugar rises in early morning hours due to hormonal changes.

    Creating Your Daily Routine

    The key to success with 60-second exercises is consistency and frequency. Rather than viewing exercise as a single daily event, think of it as multiple opportunities scattered throughout your day.

    60-Second Exercise to Lower Blood Sugar

    Start by identifying natural triggers in your routine. Perhaps you do calf raises every time you wash your hands, wall push-ups during commercial breaks, or chair squats while waiting for your computer to boot up. By anchoring these exercises to existing habits, you’re more likely to maintain the practice long-term.

    Consider setting gentle reminders on your phone for the first few weeks. Aim for at least five to six 60-second exercise sessions throughout the day. This totals just five to six minutes of exercise but provides cumulative benefits that rival longer workout sessions.

    Important Considerations and Safety Tips

    60-Second Exercise to Lower Blood Sugar

    Before beginning any 60 second exercise to lower blood sugar program, consult your healthcare provider, especially if you have diabetes, heart disease, or other medical conditions. Your doctor can help you understand how exercise might interact with your medications.

    If you take insulin or certain diabetes medications, be aware that a 60 second exercise to lower blood sugar can significantly reduce glucose levels, potentially causing hypoglycemia. Monitor closely when starting and keep fast-acting carbohydrates nearby.

    Start gently if you’re new to exercise. Your first 60 second exercise to lower blood sugar doesn’t need to be performed at maximum intensity. Begin with comfortable movements and gradually increase pace and effort as your fitness improves.

    Measuring Your Success

    To truly understand the impact of these 60-second exercises, track your blood sugar levels before and after implementing this routine. Many people notice improvements within days, though individual results vary based on factors like current fitness level, diet, medication, and overall health status.

    60-Second Exercise to Lower Blood Sugar

    Keep a simple log noting when you exercise and your blood sugar readings. This information becomes valuable for identifying patterns and optimizing your routine. You might discover that certain exercises or specific timing works better for your unique physiology.

    Conclusion

    The 60-second exercise approach to lowering blood sugar naturally represents a practical, accessible solution for anyone looking to improve their metabolic health. By breaking free from the notion that exercise requires lengthy gym sessions, you can harness the power of brief, frequent movement throughout your day.

    These simple exercises work because they activate your body’s natural glucose-regulating mechanisms, helping muscles absorb sugar from your bloodstream efficiently. Combined with proper nutrition, adequate sleep, and stress management, this approach can contribute significantly to better blood sugar control and overall wellness.

    Remember, consistency trumps intensity when it comes to these brief exercises. The person who performs six 60-second exercises daily will likely see better results than someone who occasionally completes a longer workout. Start today with just one 60-second exercise, and gradually build from there. Your blood sugar levels – and your overall health – will thank you for it.

    Frequently Asked Questions

    How quickly will I see results in my blood sugar levels?

    Most people notice immediate effects within 30 to 90 minutes after performing these 60-second exercises, especially when done after meals. You might see a reduction of 10 to 30 points in your blood sugar reading compared to not exercising at all. However, the long-term benefits become more pronounced with consistent practice over weeks. After 2 to 4 weeks of regularly performing these exercises throughout the day, many individuals report more stable overall blood sugar levels, reduced post-meal spikes, and better fasting glucose readings. Keep in mind that individual results vary based on factors like current fitness level, diet, medication, and the severity of insulin resistance. For the most accurate picture of your progress, test your blood sugar before and after exercises, and track patterns over time rather than focusing on single readings.

    Can I do these exercises if I have mobility issues or joint pain?

    Absolutely. One of the greatest advantages of 60-second exercises is their adaptability to various fitness levels and physical limitations. If you have knee problems, skip the squats and high knees, focusing instead on upper body movements like wall push-ups or seated arm exercises. For those with limited mobility, even seated exercises can be effective—try seated marches where you lift your knees while sitting, or arm circles and shoulder movements. The key is engaging your muscles, not the specific exercise itself. Chair-based exercises, resistance band movements, and gentle range-of-motion activities all help muscles absorb glucose from the bloodstream. If you’re dealing with arthritis or chronic pain, start very gently and consider performing exercises in warm water if you have access to a pool. Always listen to your body and stop if you experience sharp pain. Consulting with a physical therapist can help you identify safe, effective movements tailored to your specific limitations.

    Should I still do these exercises if I’m already taking diabetes medication?

    Yes, but with important precautions. Exercise works synergistically with diabetes medications, which means combining them can be very effective for blood sugar control—but it also means your levels might drop more than expected. If you take insulin or medications like sulfonylureas that can cause hypoglycemia, monitor your blood sugar closely when starting this routine. You may need to adjust your medication dosages as your body becomes more efficient at using glucose, so work closely with your healthcare provider during this transition. Check your blood sugar before exercising, especially in the beginning, and keep fast-acting carbohydrates like glucose tablets or juice nearby in case of low blood sugar. Many people find that regular exercise allows them to reduce medication over time under medical supervision, but never adjust your medications without consulting your doctor first. The good news is that these brief exercises are generally safer than prolonged intense workouts because they’re less likely to cause dramatic blood sugar drops, making them an excellent option for people on medication.